
Robust Weight Transfer for Blender
Tags
Product Description
 Join the Discord for support and news!: https://discord.gg/Fdy5RpunY4
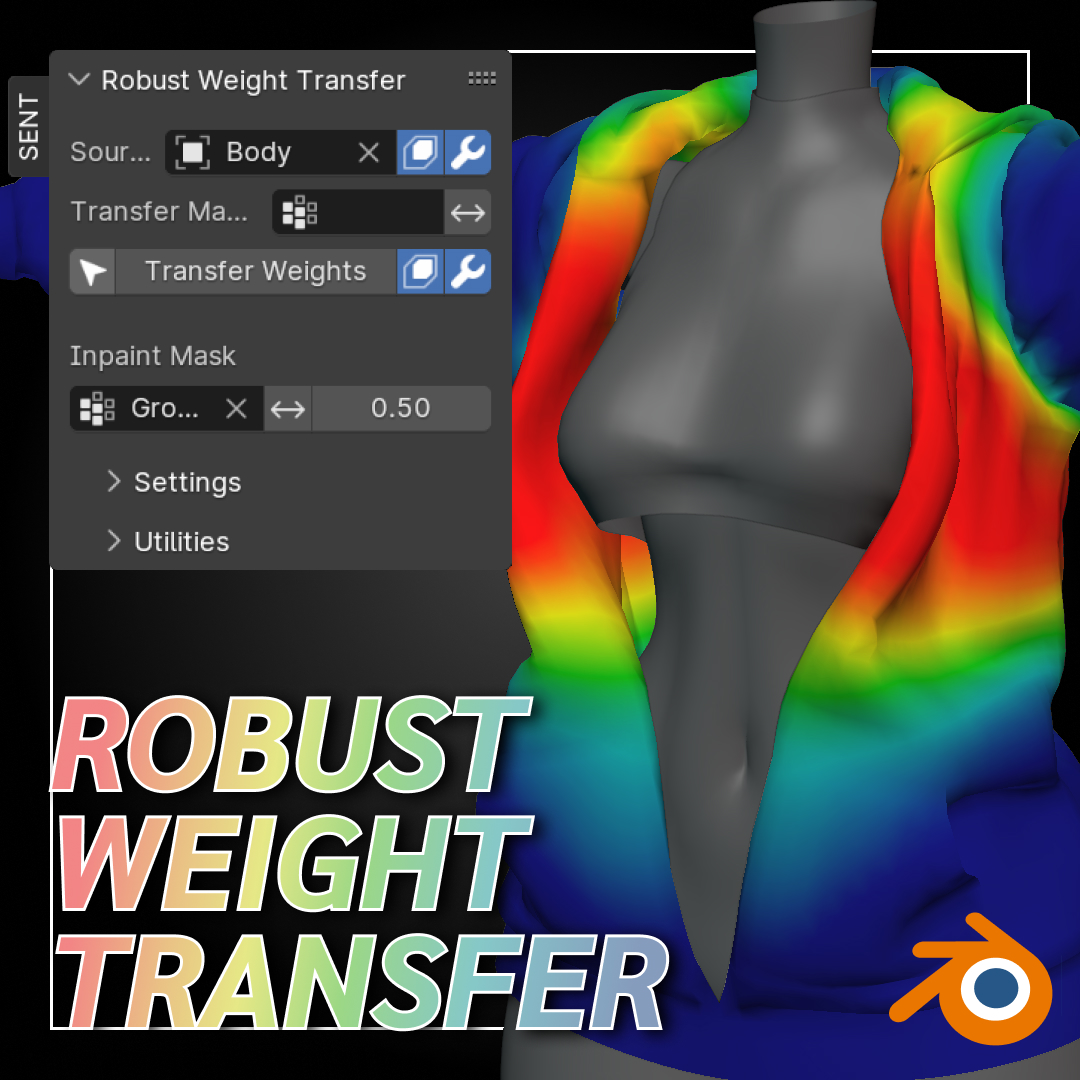
A Blender addon for getting smooth weight transfer results with just one click!
Robust Weight Transfer can successfully transfer weights from the body, without needing additional weight painting work like smoothing in problem areas (between legs, between chest, armpits).
Tutorial
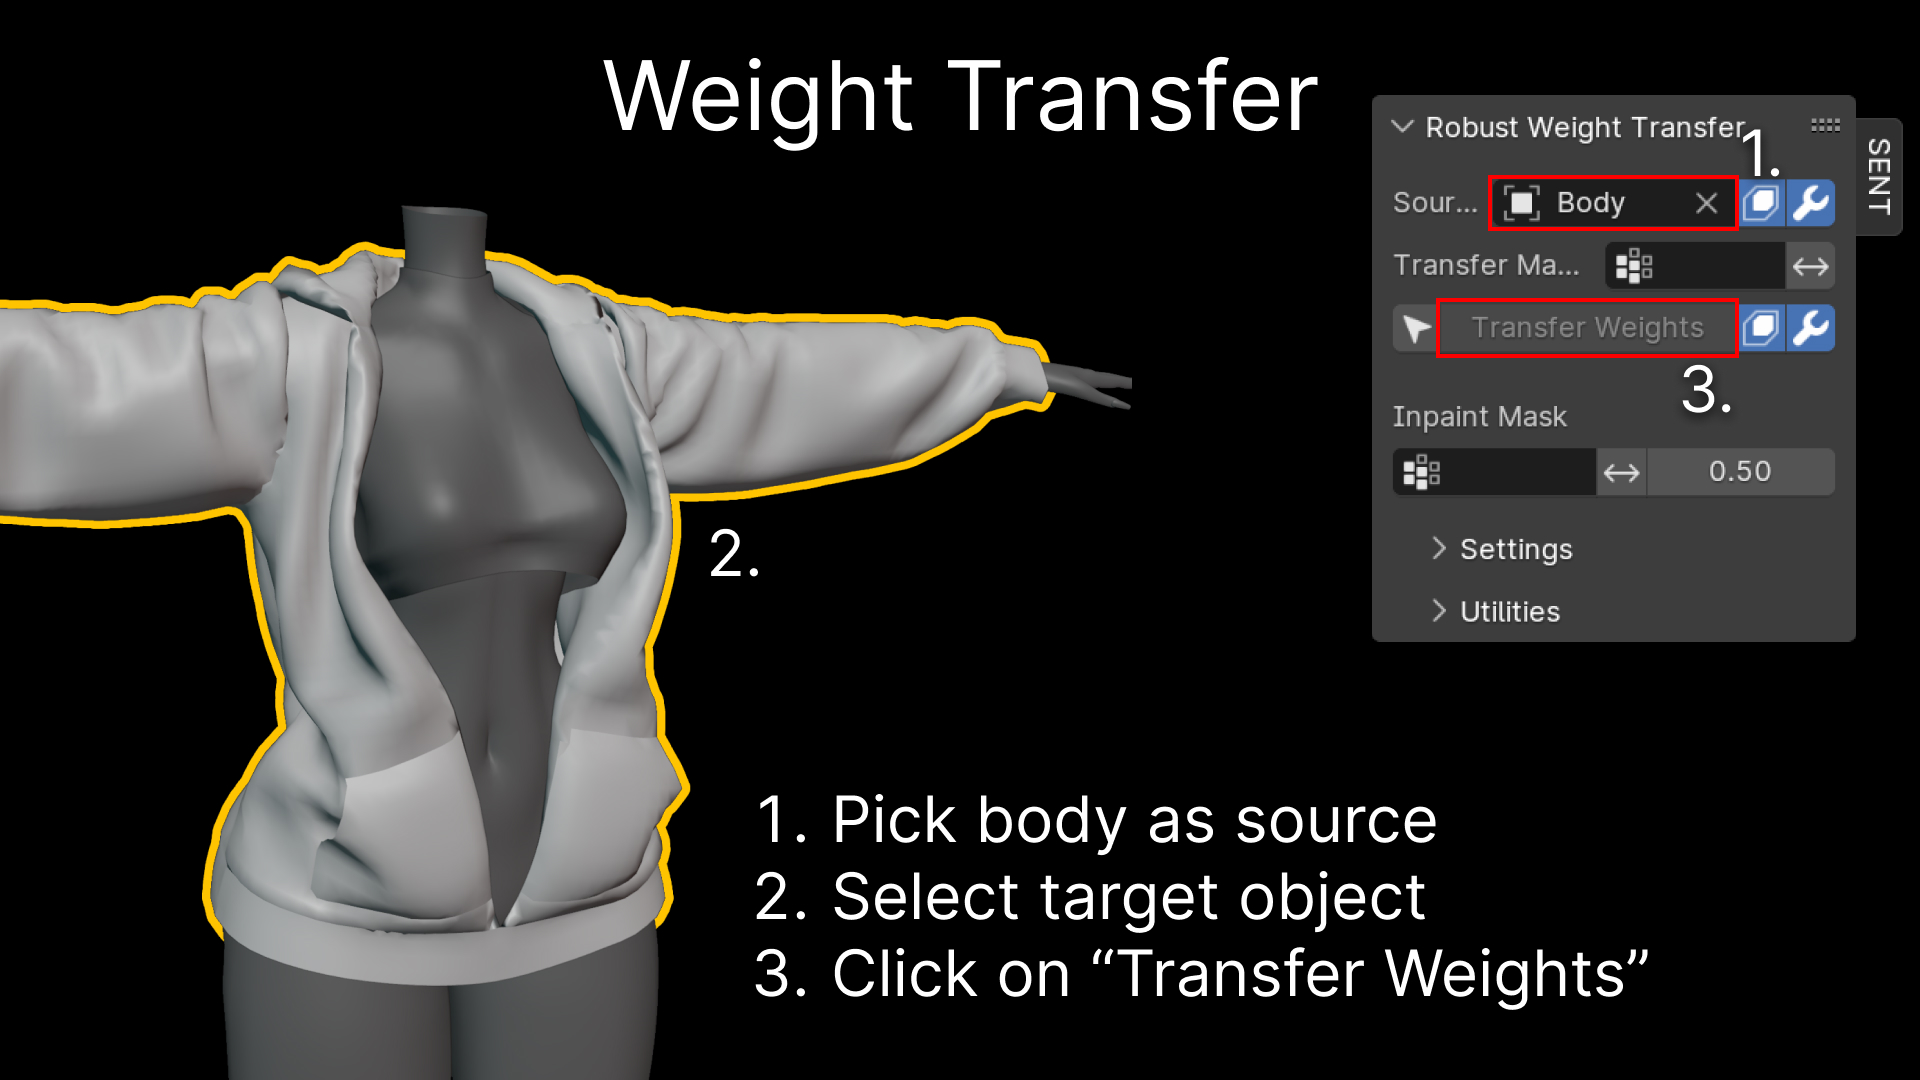
After installing the addon, the panel shows up in the sidebar as SENT. Transferring weights only needs a few clicks.
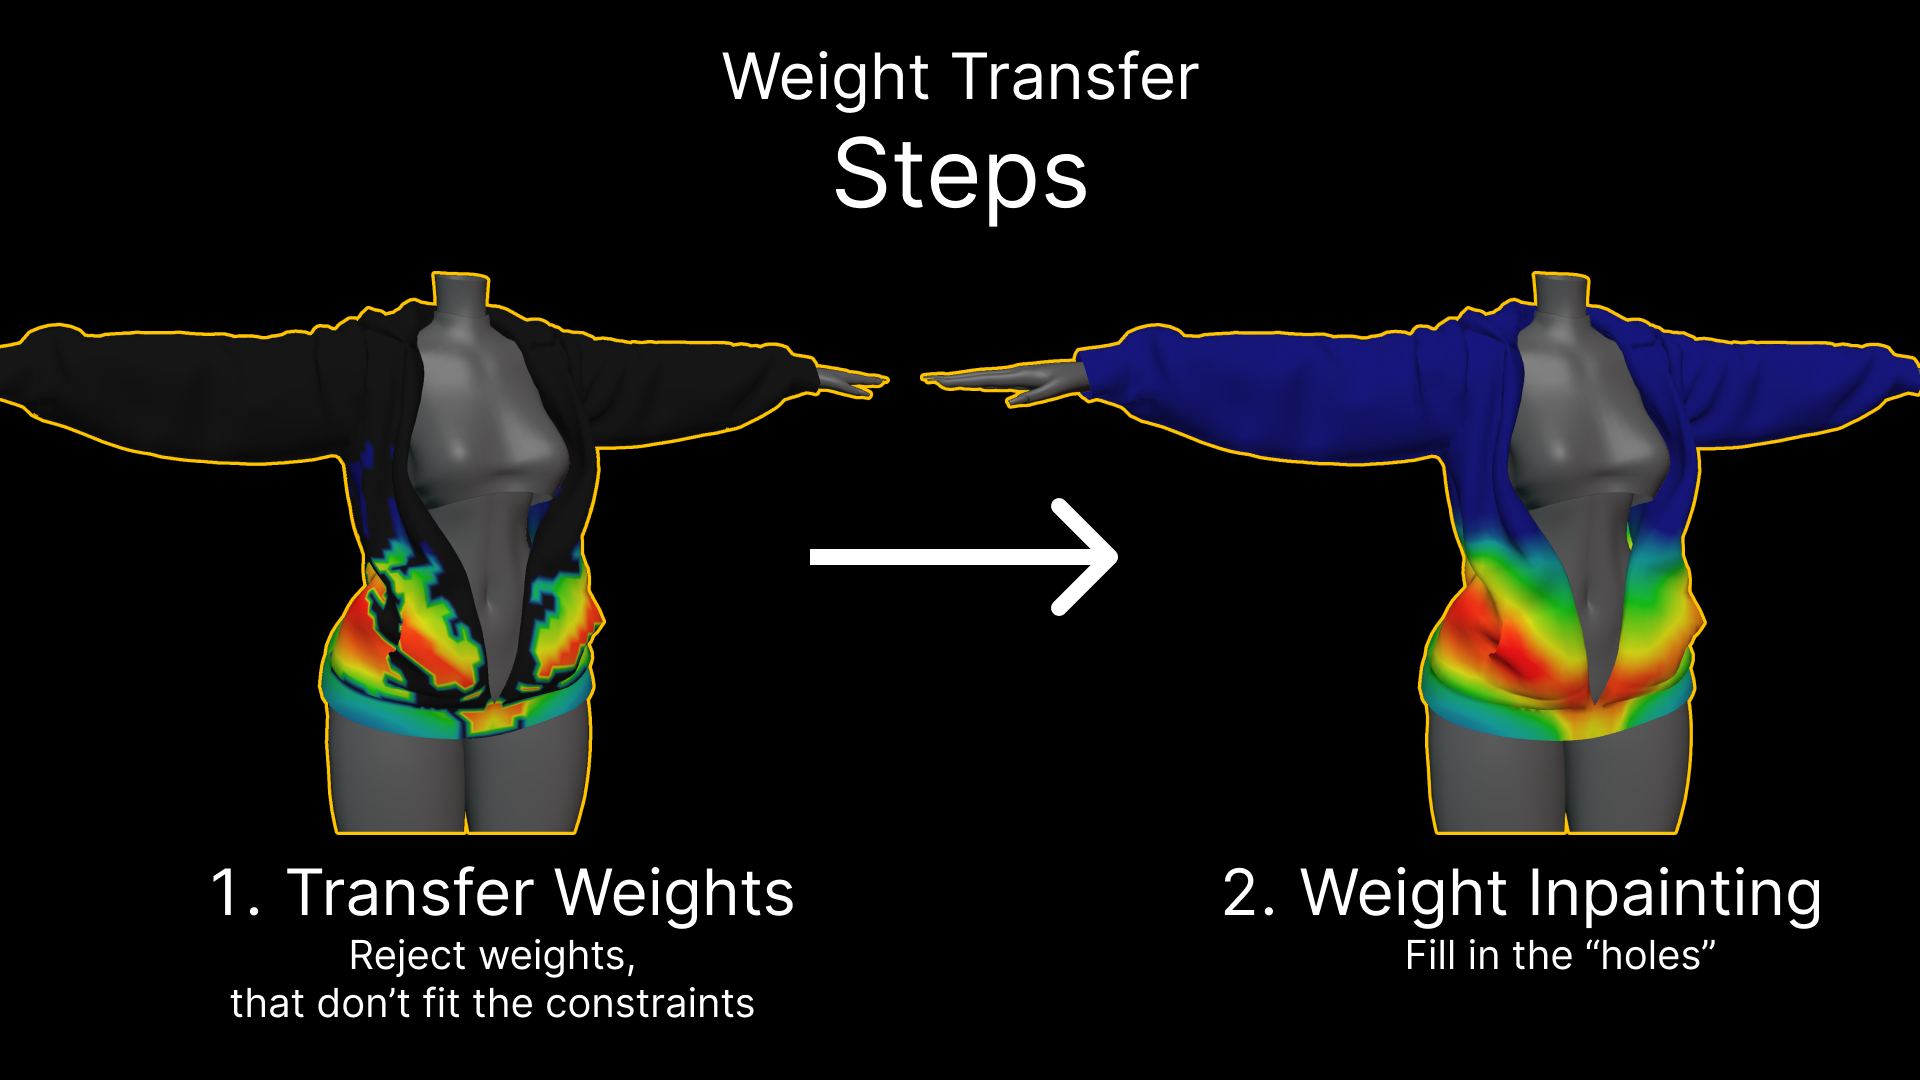
 Behind the scenes, the weight transfer does two steps (with optional smoothing).
First, the weights are transferred from the body similar to Blender’s Data Transfer with Face Interpolated. Weights are rejected/not transferred, when 1. source and target vertices are too far away 2. the surface orientations/vertex normals are too different.
This leaves the mesh with “holes” that need to be filled with plausible weights. The Weight Inpainting step can do this reliably and does the heavy lifting during Weight Transfer. More about it later.
The idea behind rejecting a transfer is to remove false weights that would’ve gotten transferred from a wrong area. For example sleeves transferring weights from the torso instead of arms at the armpit area.
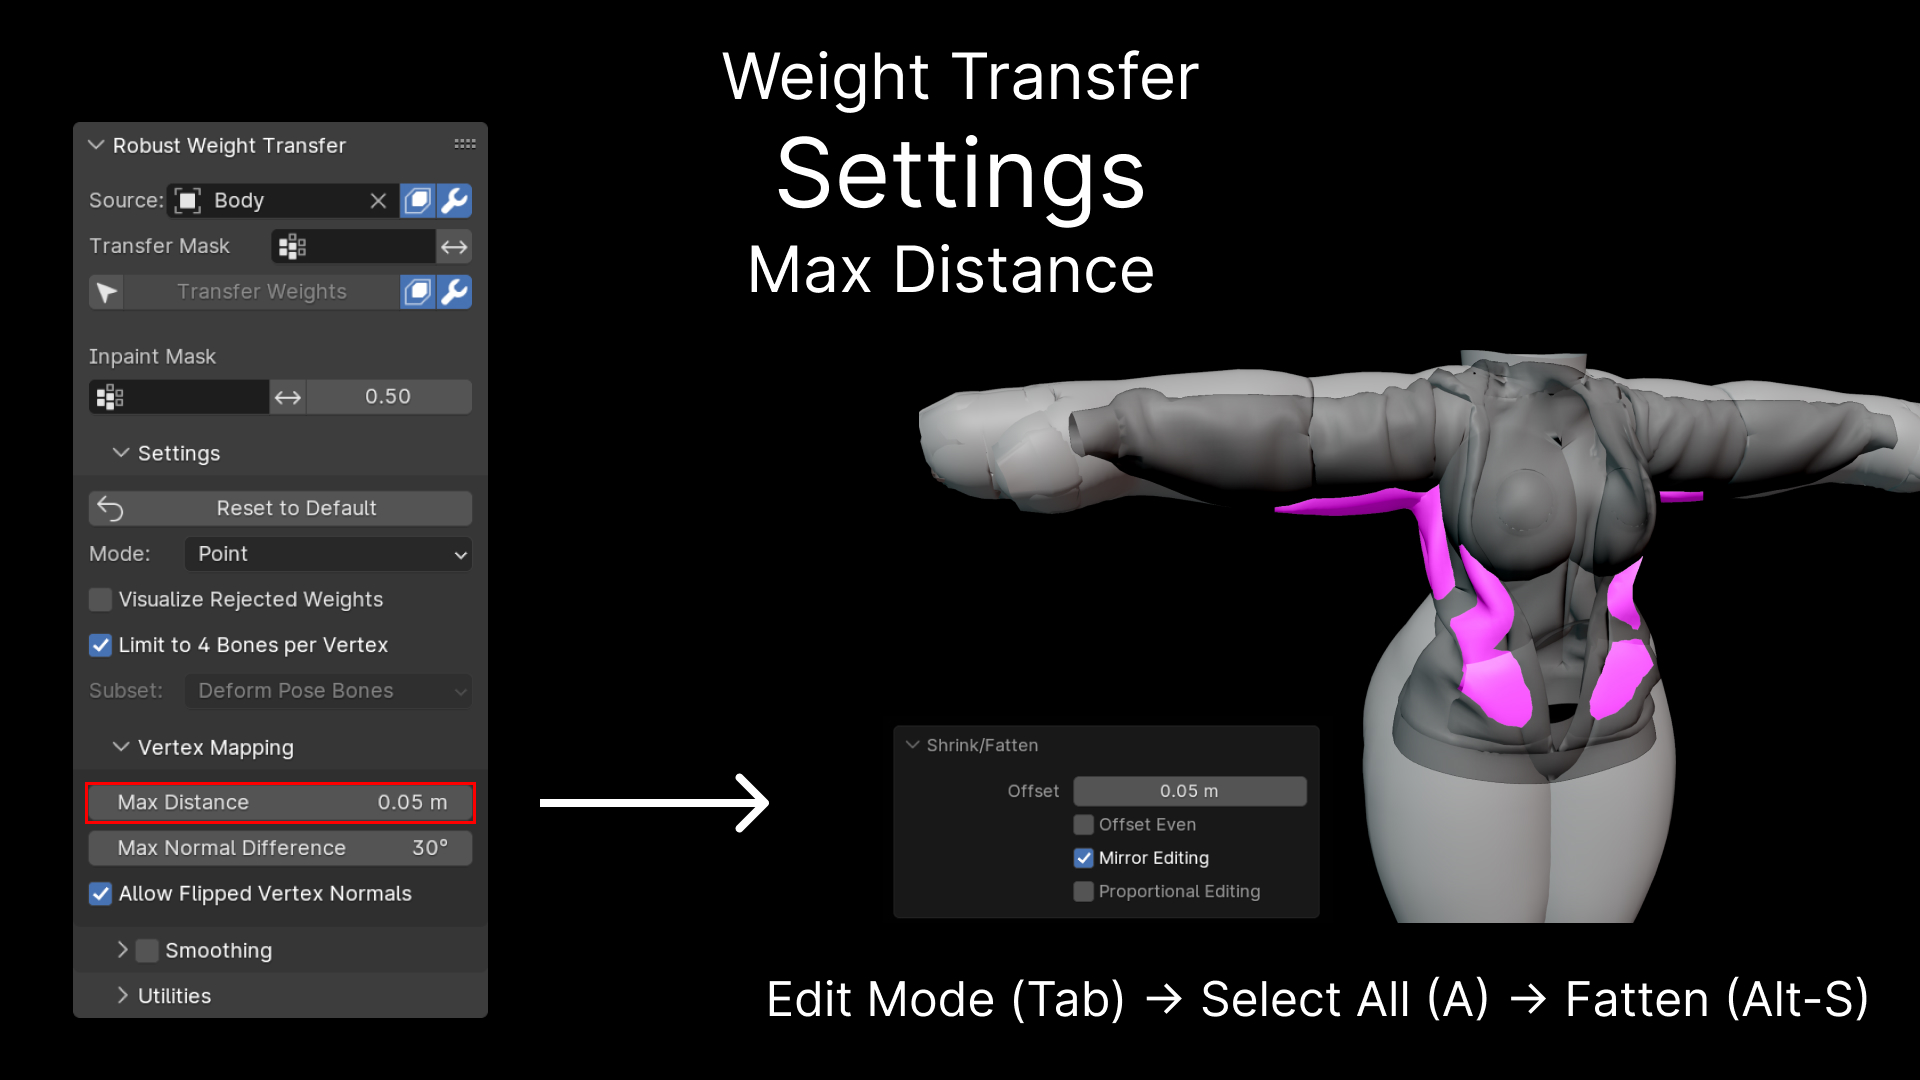
 The first constraint that a vertex match has to oblige, is the distance between target vertex and source. Max Distance controls it.
The distance can be visualized by using the Fatten operator in Edit Mode like shown here.
Pink are weights that would get rejected because of the distance.
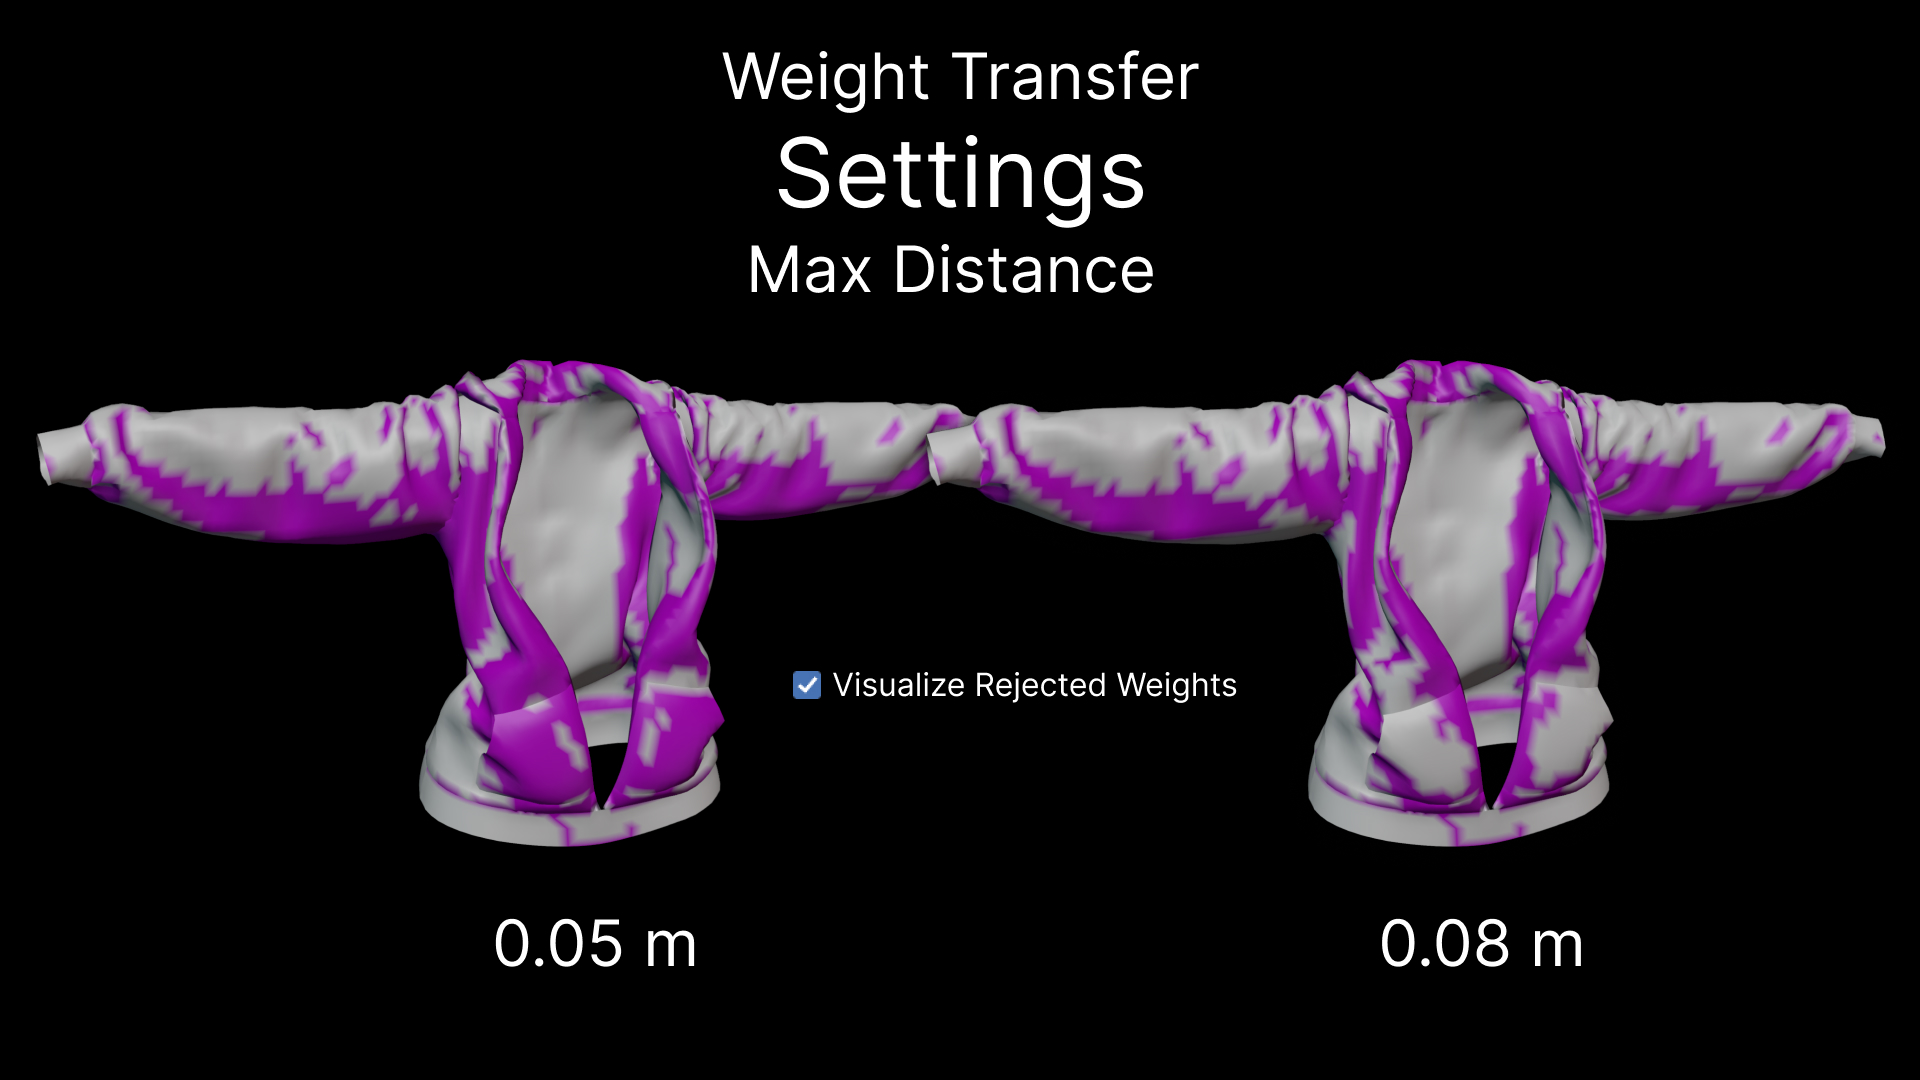
 By increasing the Max Distance value from the default 0.05 m to 0.08 m, more vertices will get weights transferred to, instead of inpainted.
 The second constraint is the vertex normal difference between target vertex and source. This value tells how much the orientation of the target object surface and body surface are allowed to differ.
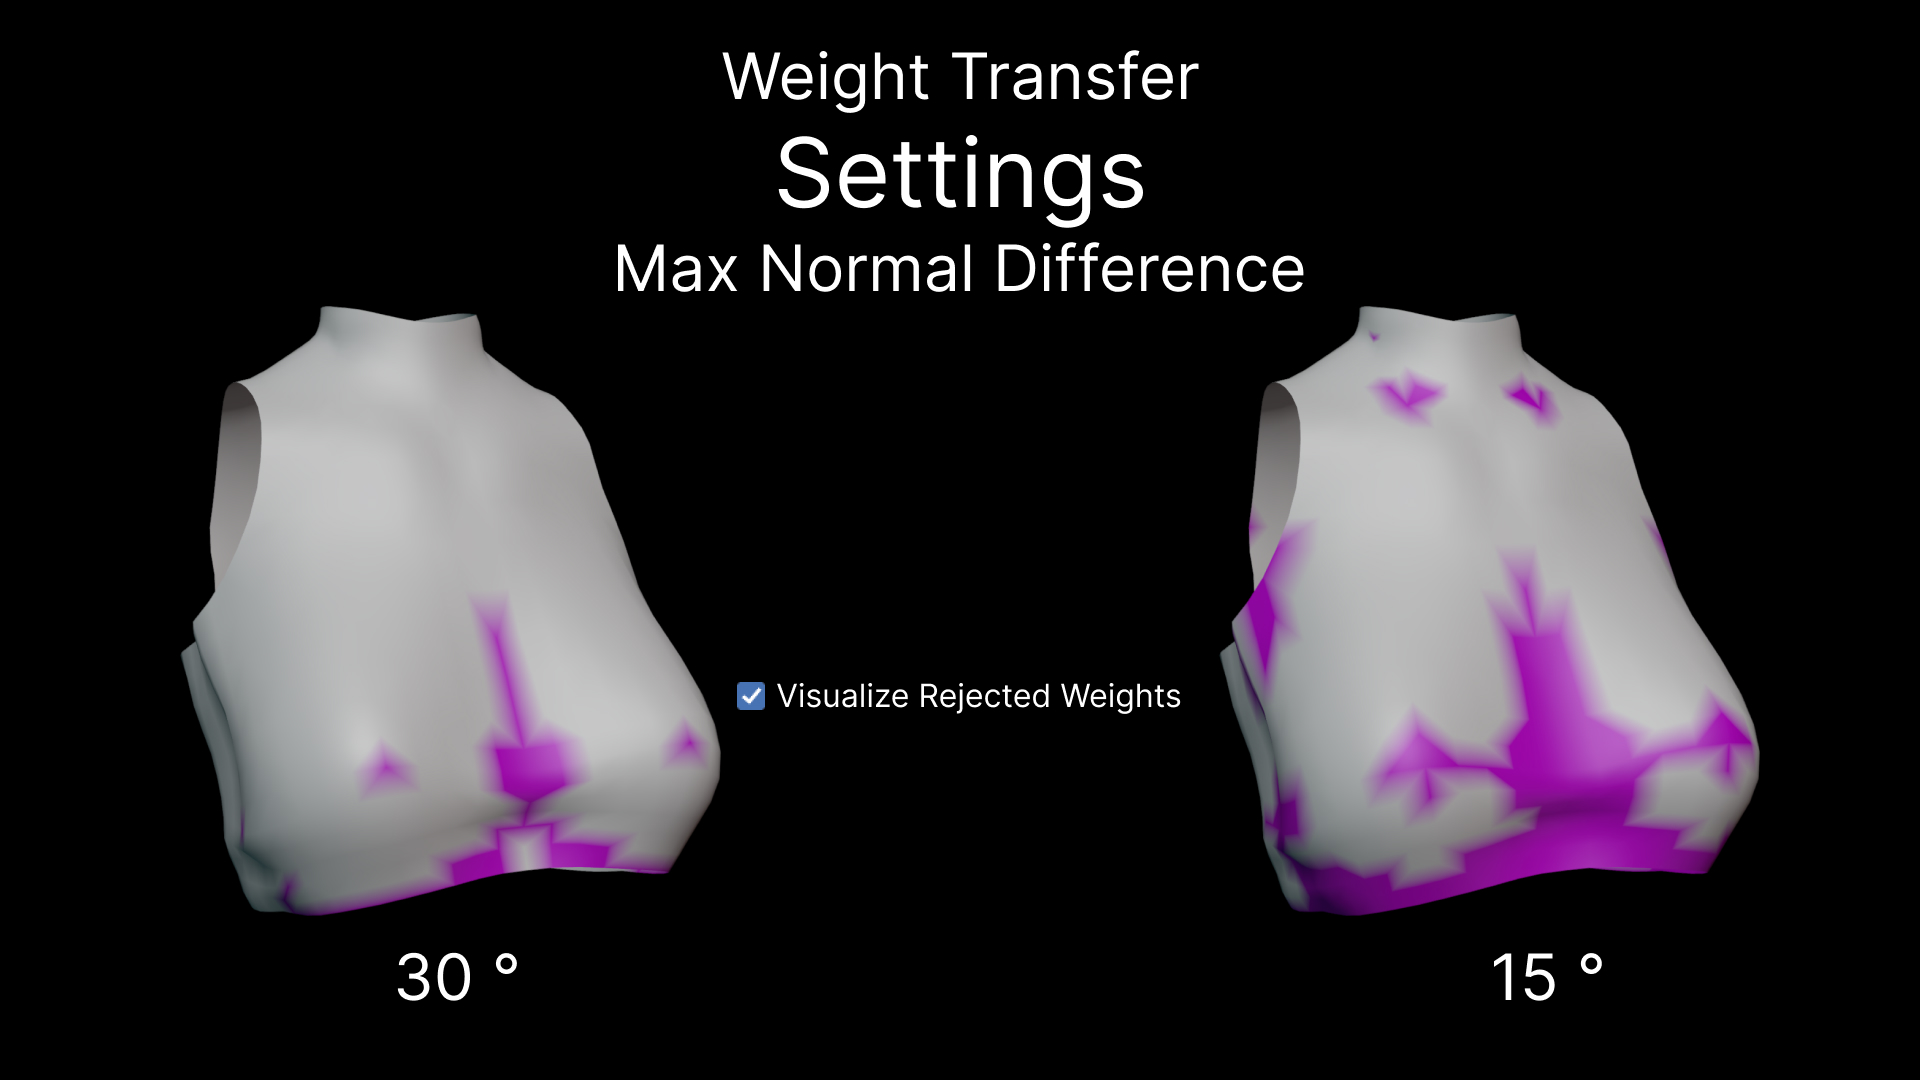
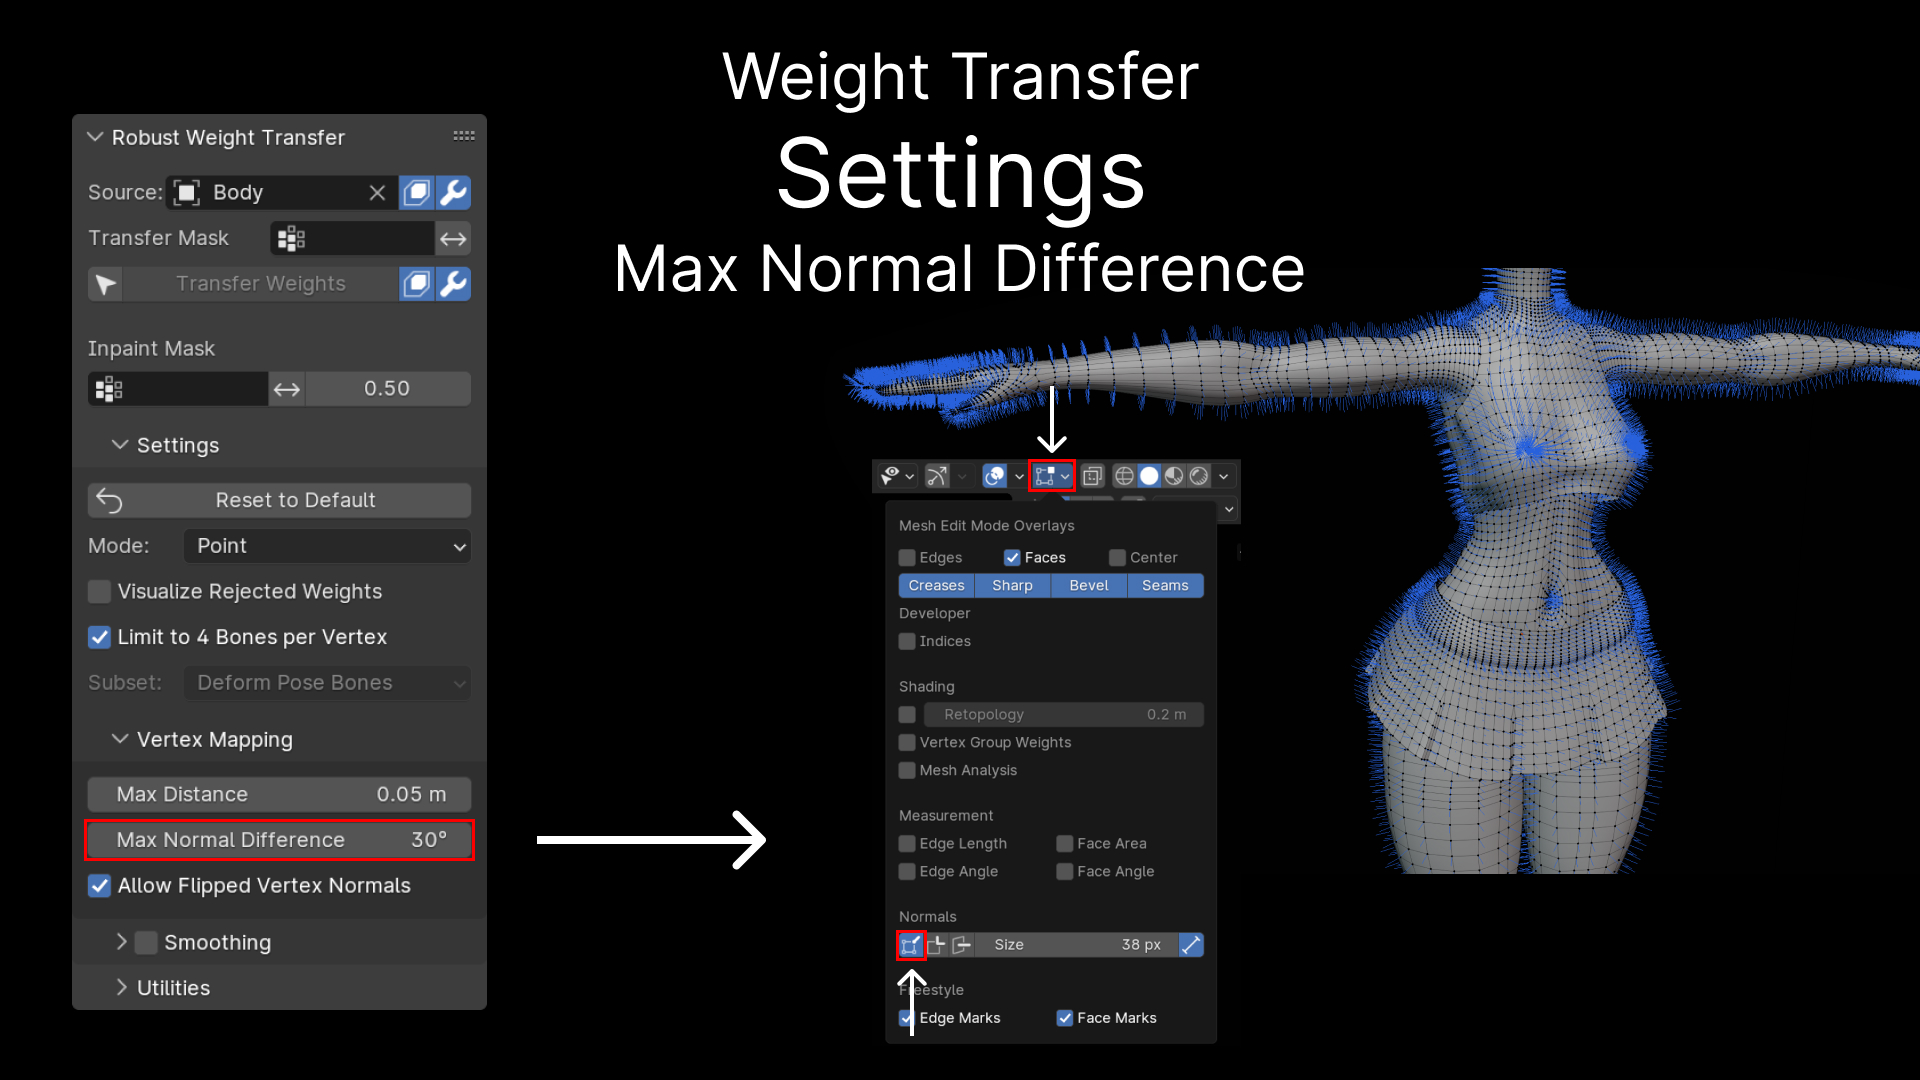 Decreasing Max Normal Difference from the default to 30° to 15° can help transfer weights between the chest more smoothly.
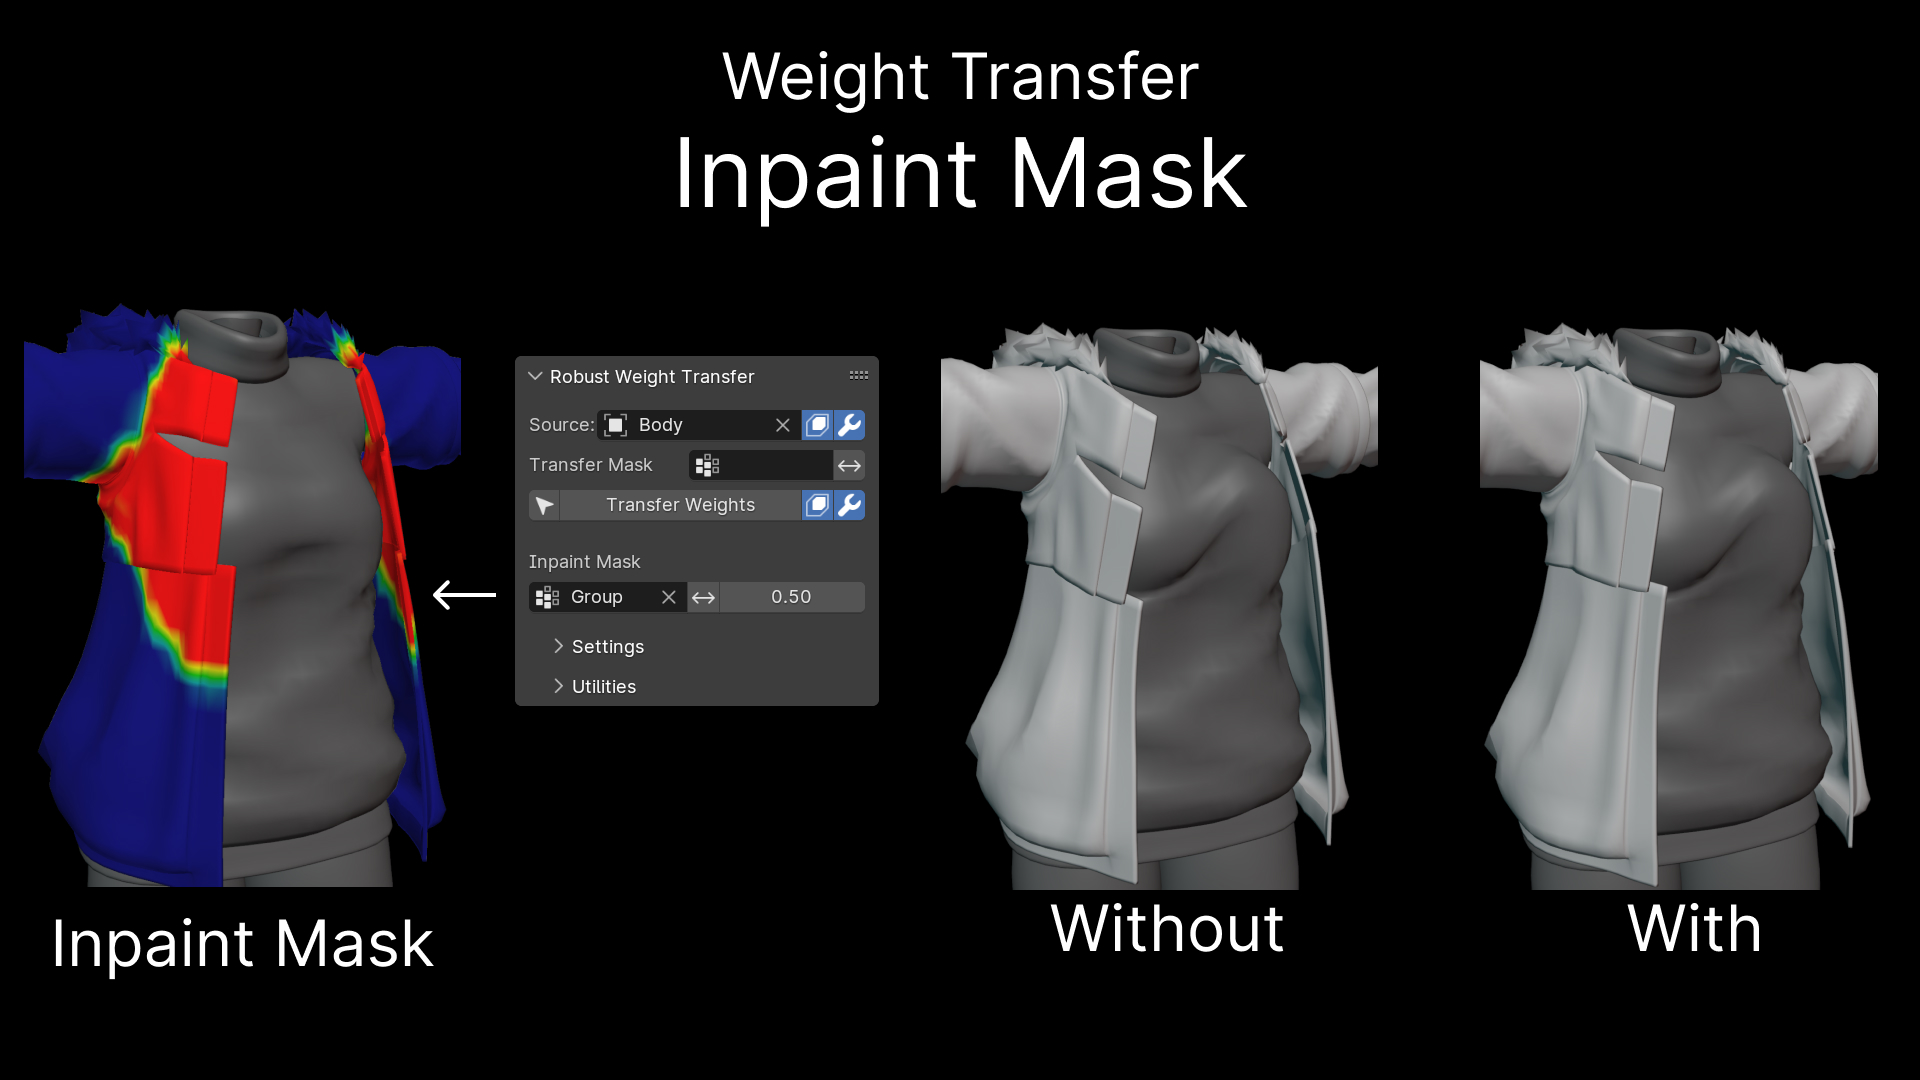
 Another way to control which areas of a mesh should be inpainted/weights getting rejected, is by using the Inpaint Mask. Any vertex group that has been authored can be used as Inpaint Mask.
The Inpaint Mask is a binary mask, meaning the vertex group weights that we use as mask, are being thresholded. By default this value is 0.5. This has the effect that the Inpaint Mask doesn’t need to be smooth in nature.
Compared to setting the Max Normal Difference, which has a global effect over the whole mesh, with the Inpaint Mask we can locally mask problem areas that should be inpainted instead of getting transferred weights from the body.
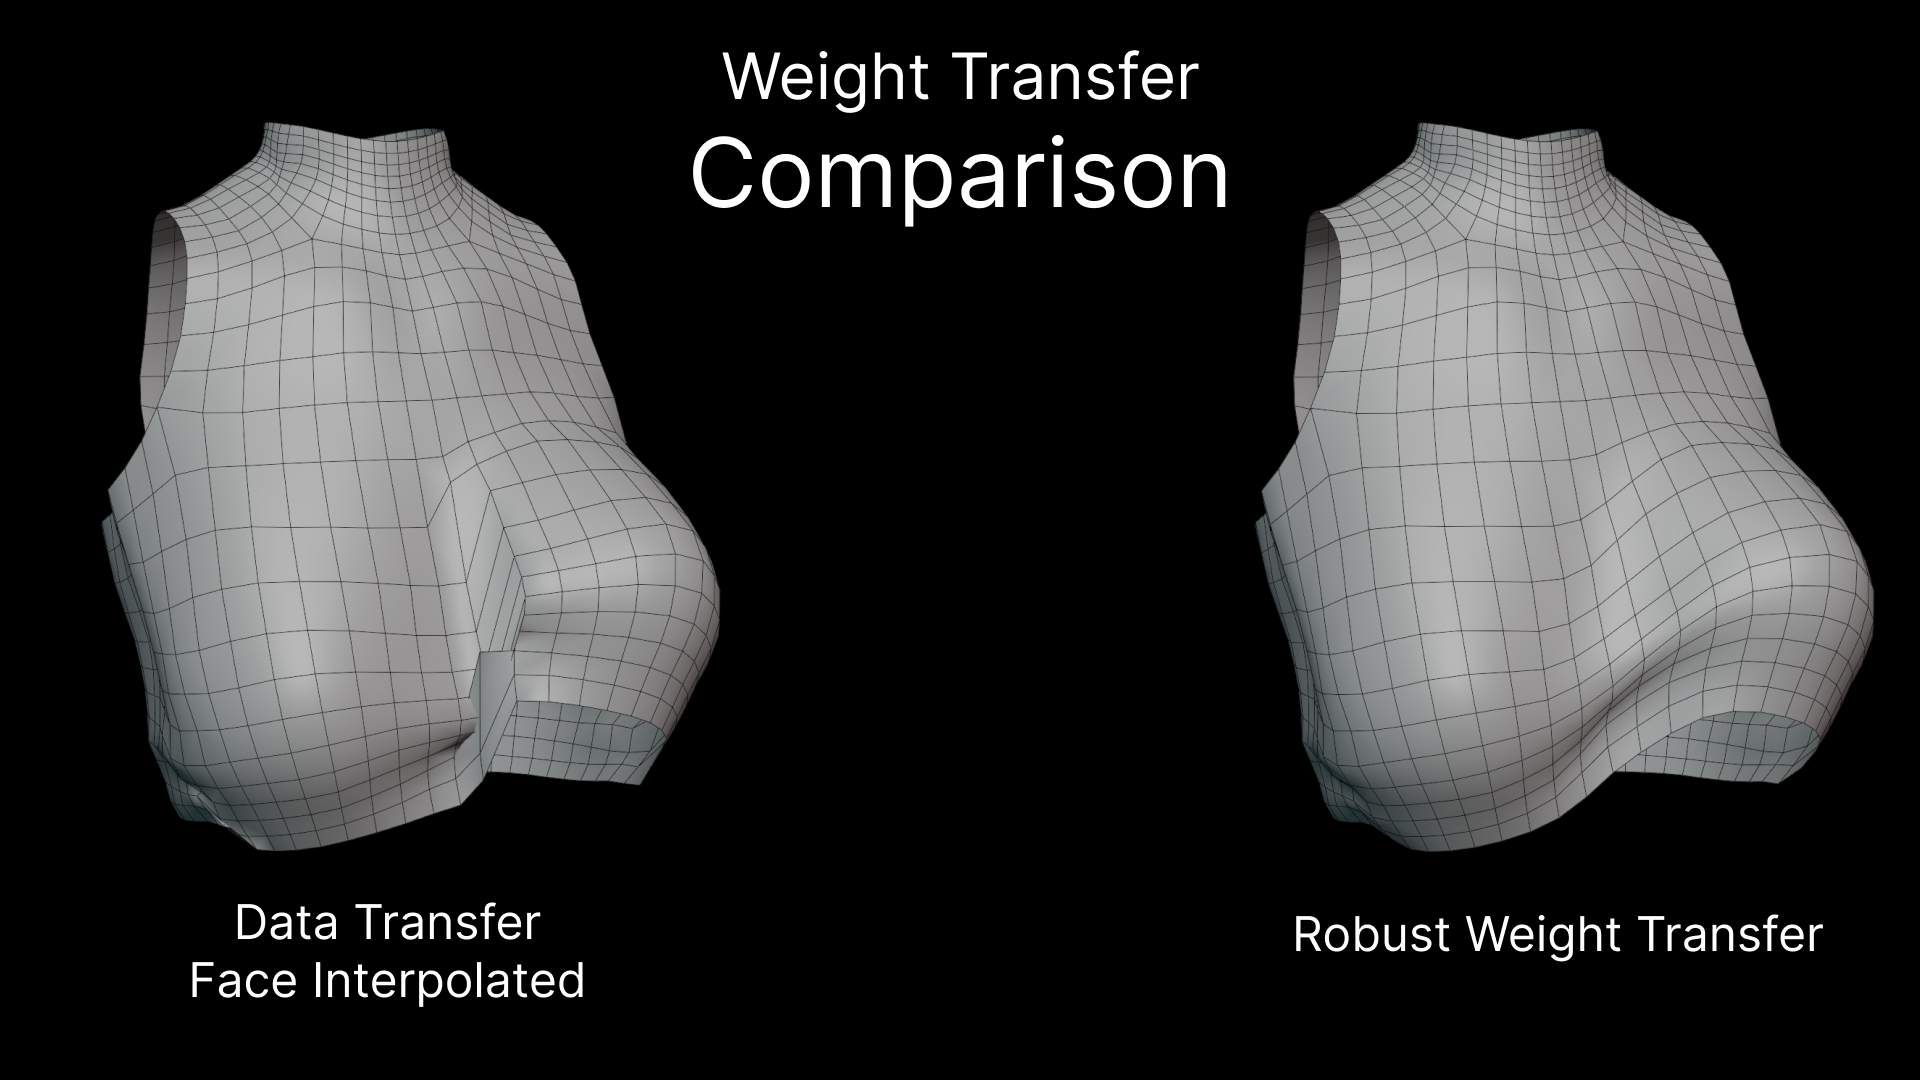
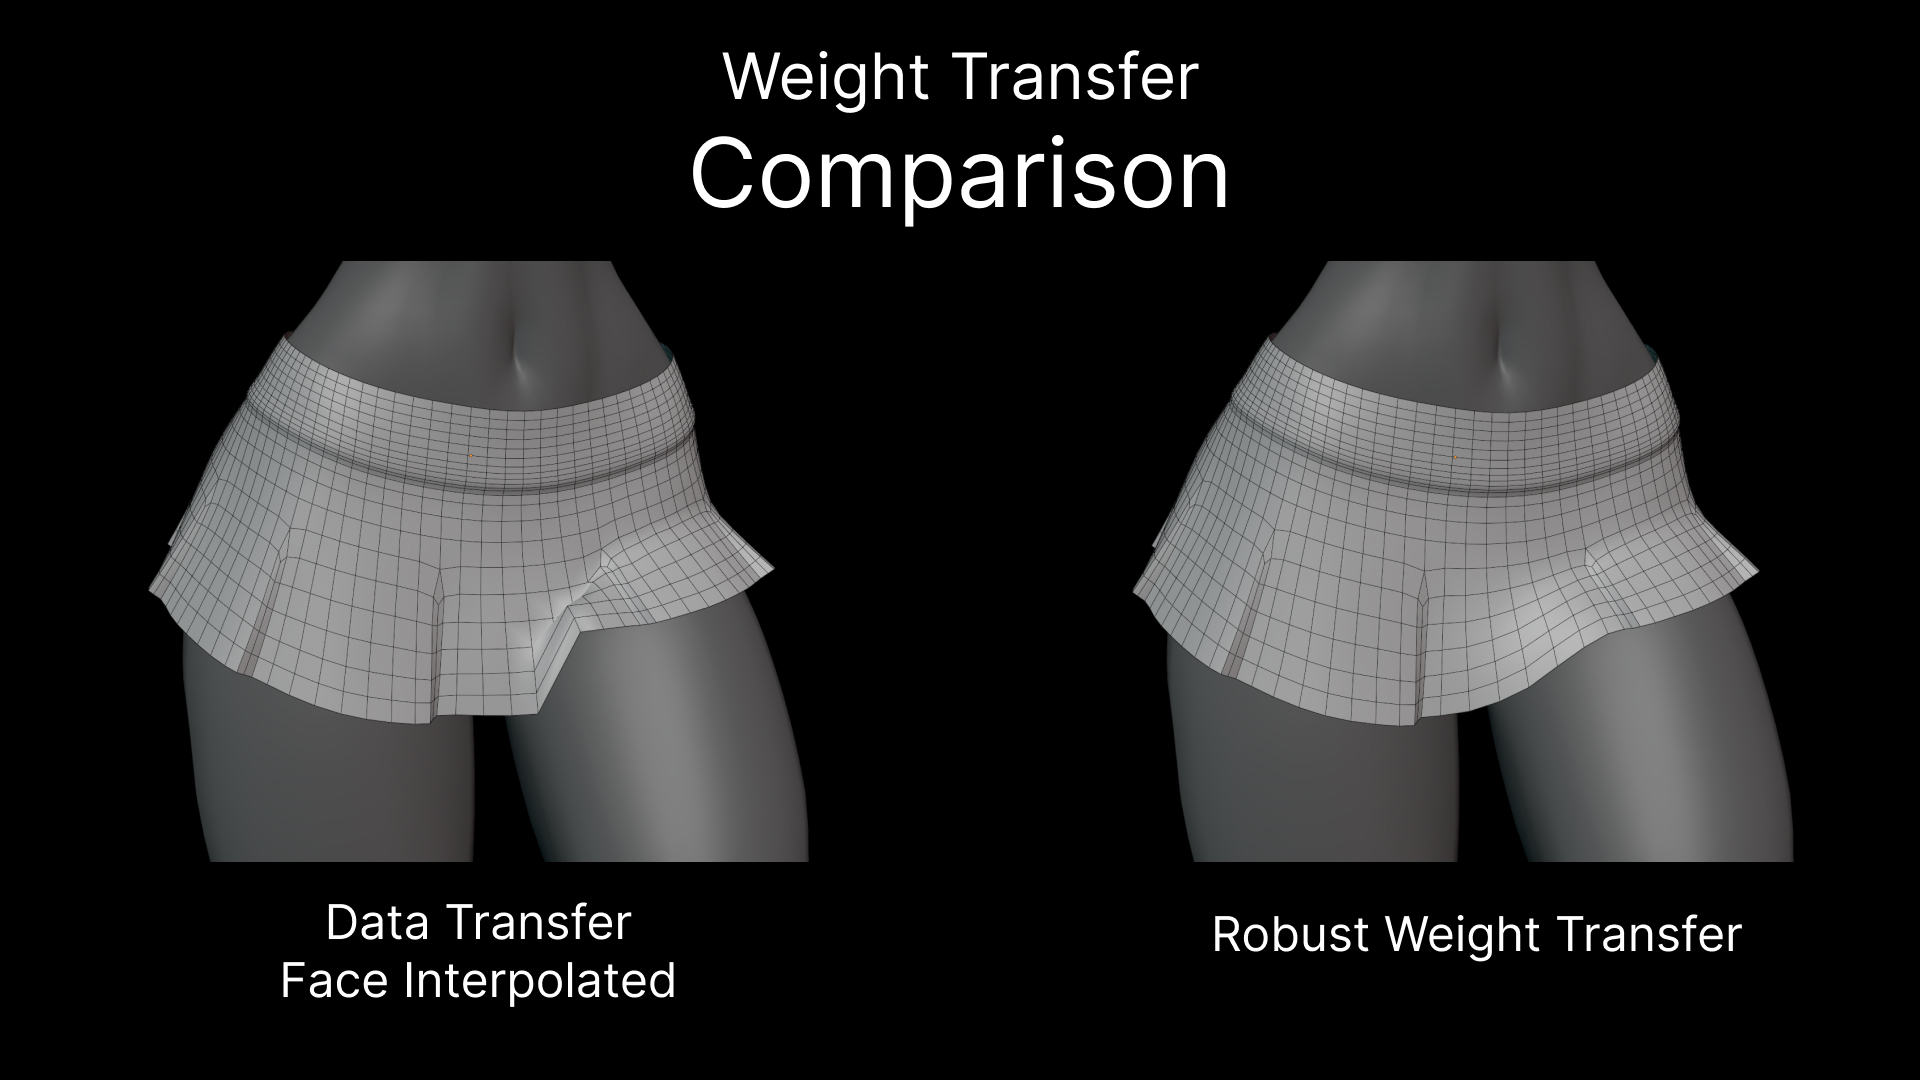
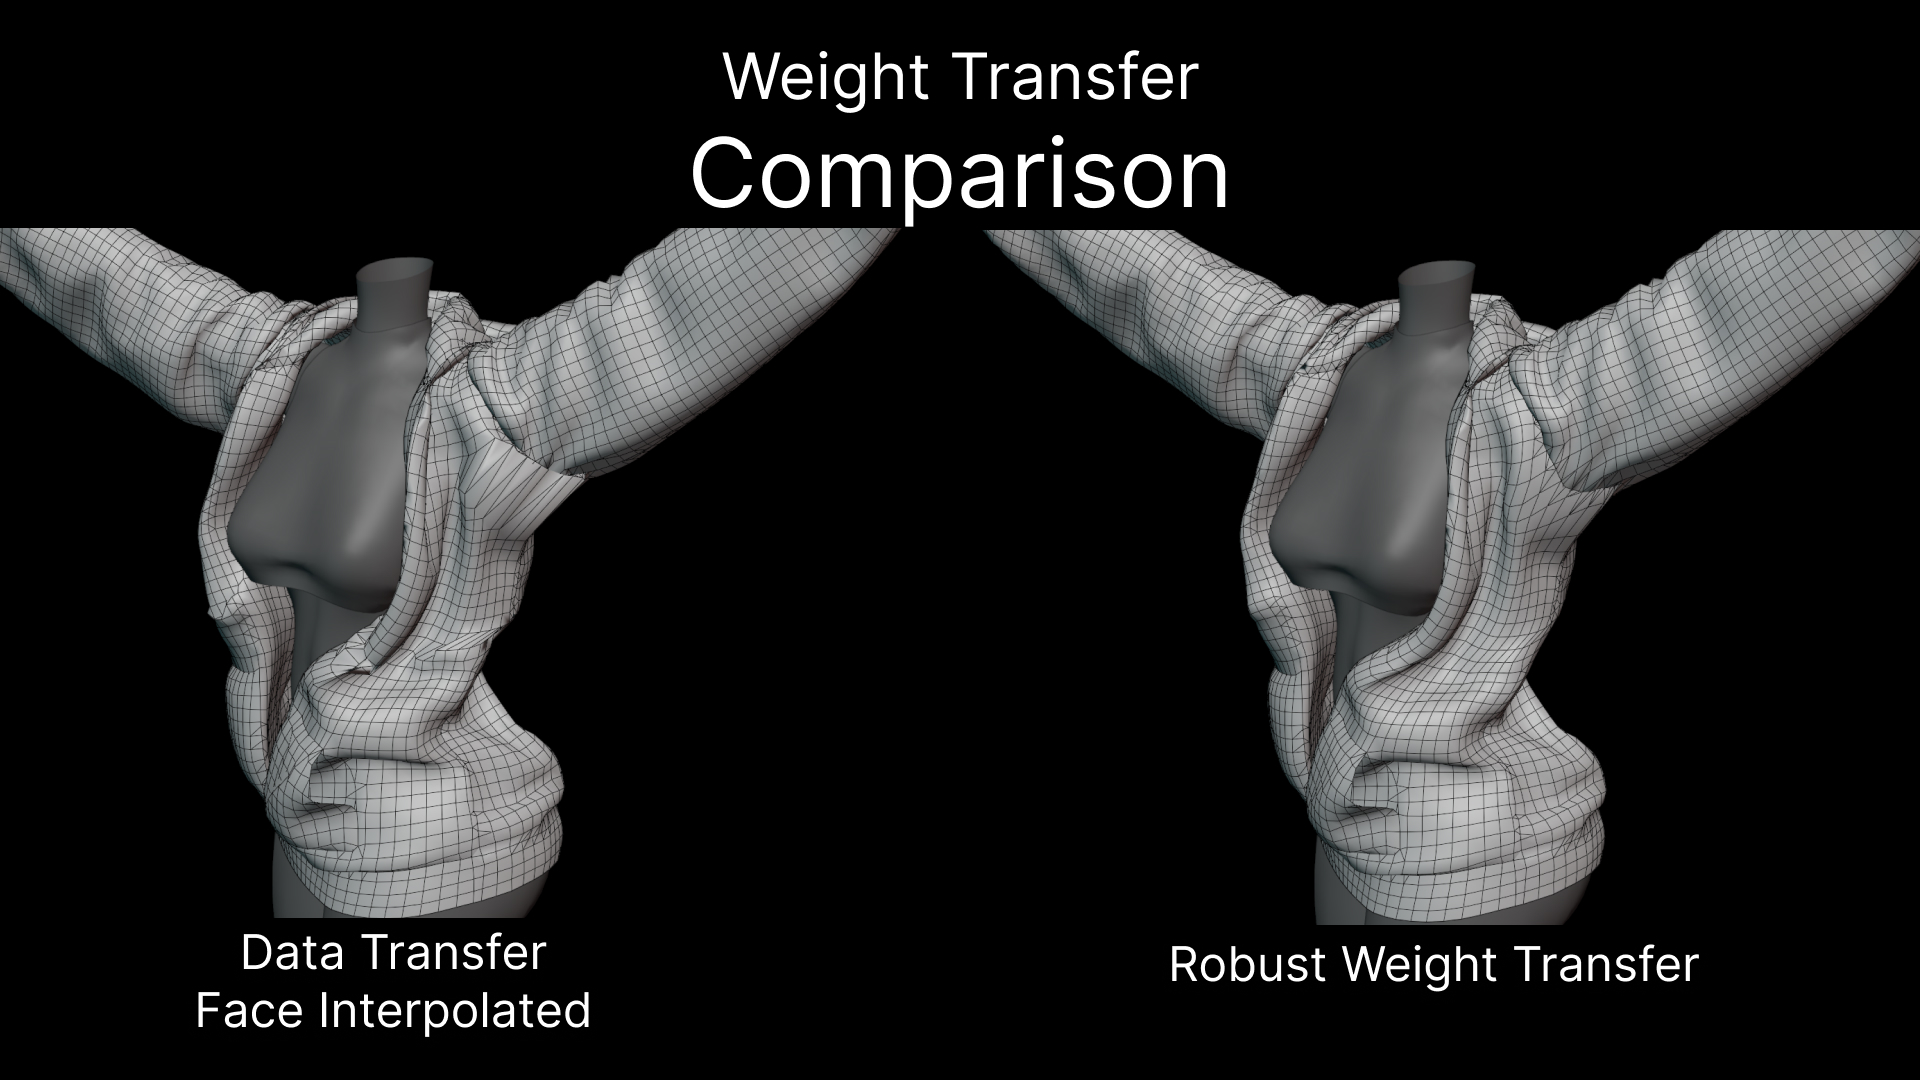
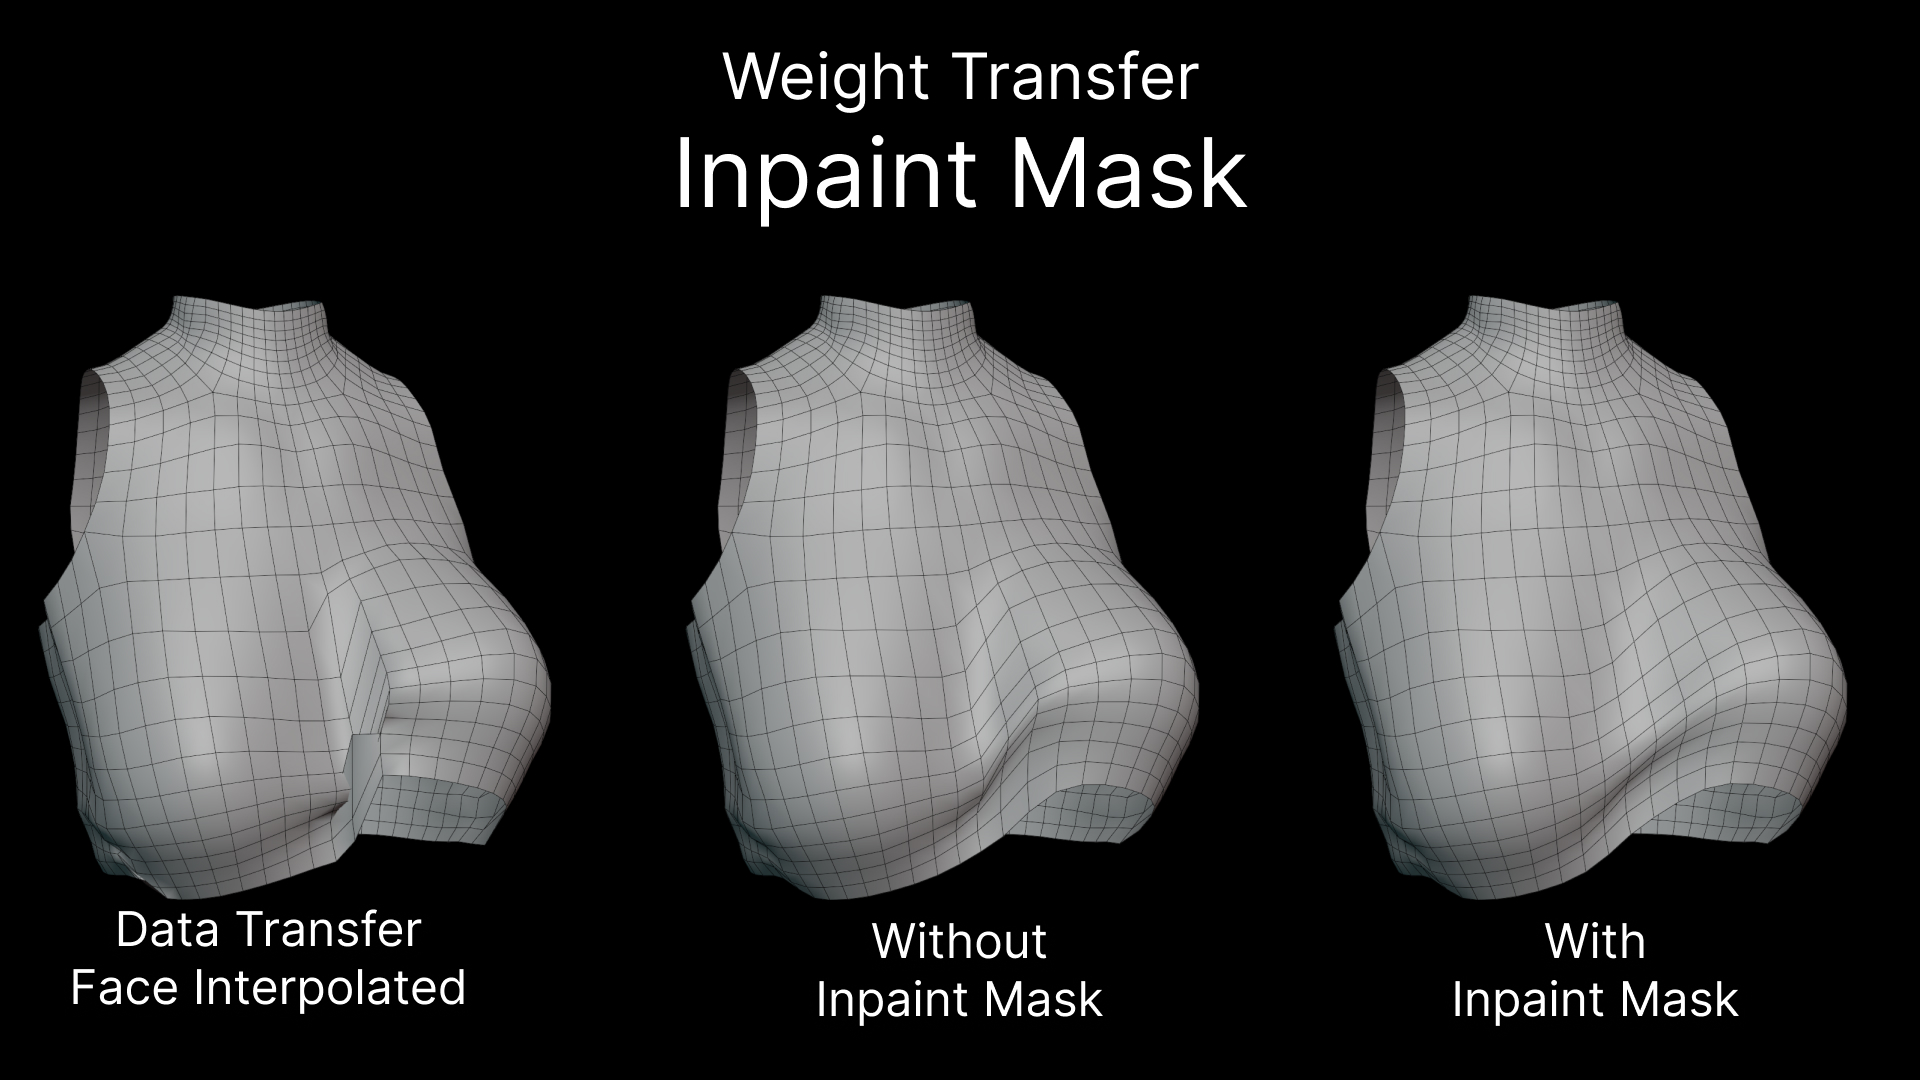
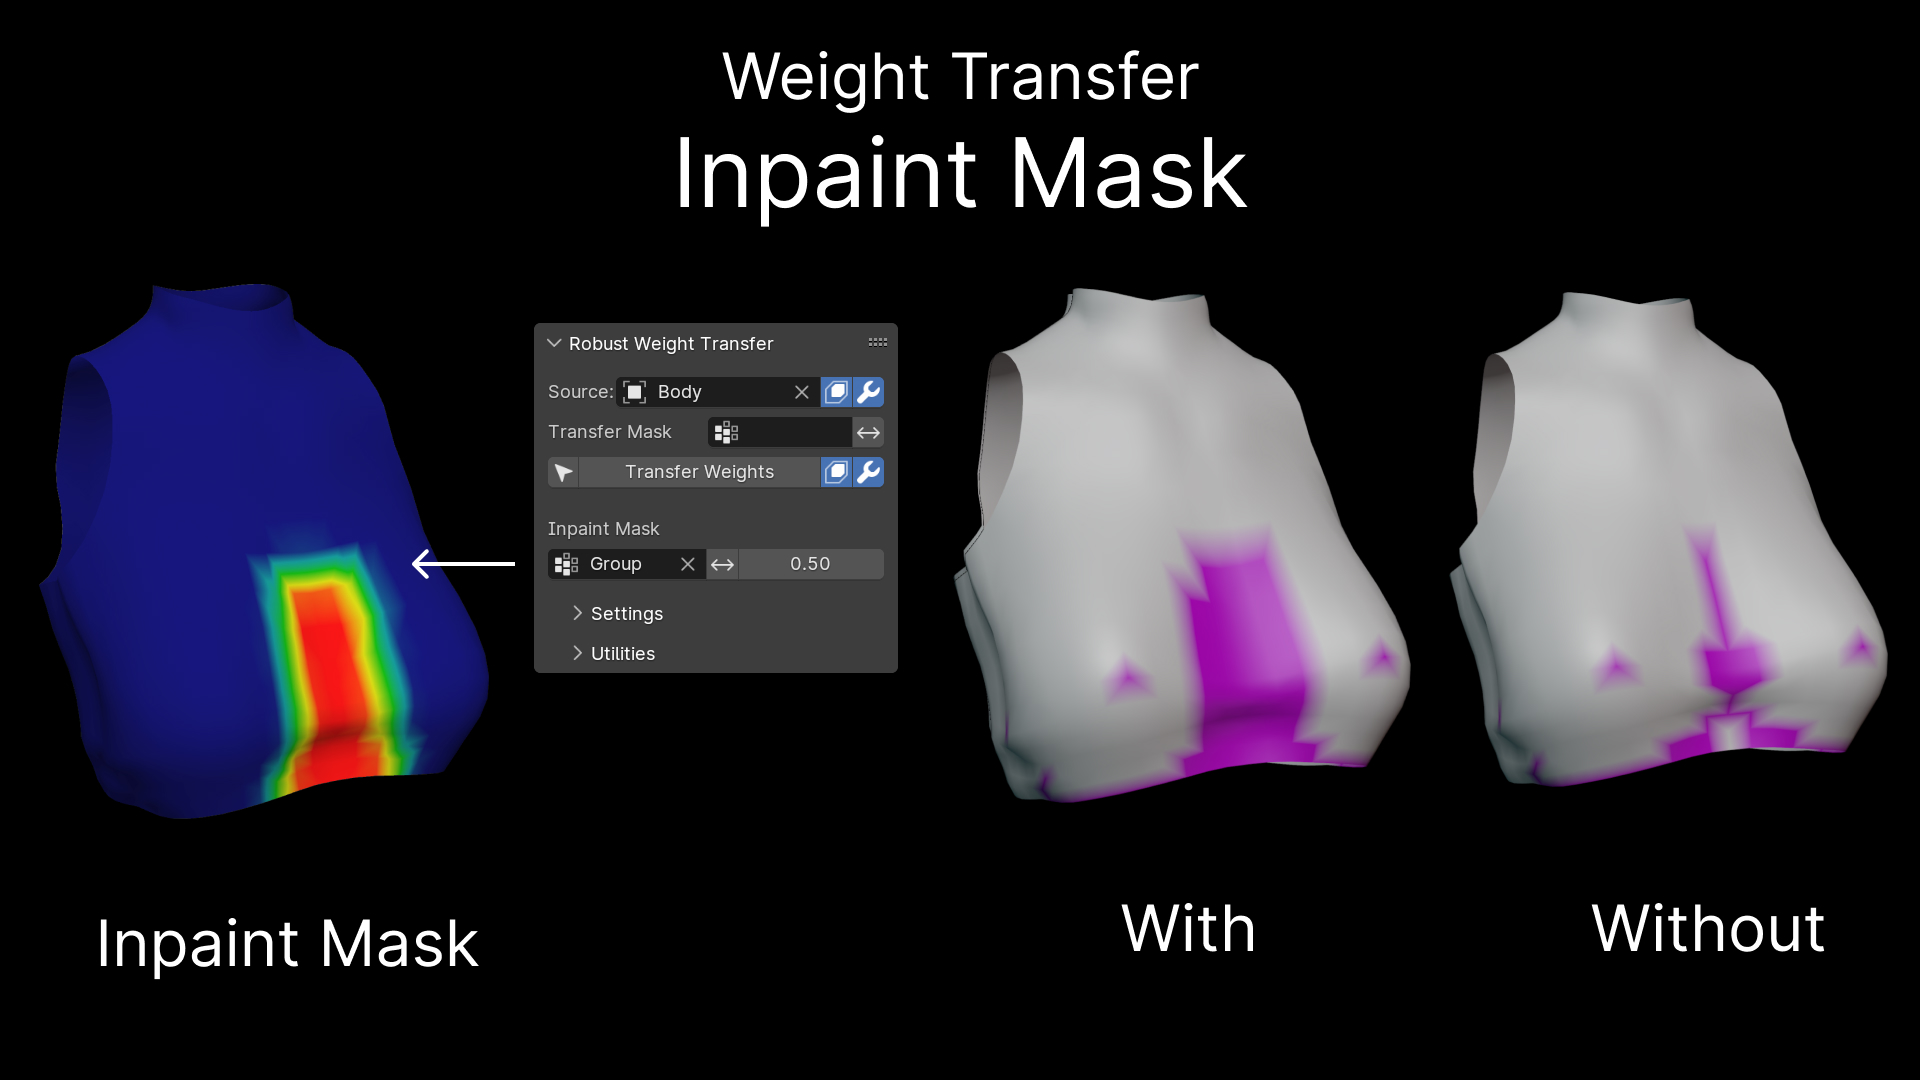 Here is a comparison between using Data Transfer, with and without using the Inpaint Mask with Robust Weight Transfer using default settings. Robust Weight Transfer was already able to produce a positive result, but with using the Inpaint Mask, we can let the Weight Inpainting step produce smoother weights for us.
 Using an Inpaint Mask should be used before manually editing with Weight Painting.
In this example an Inpaint Mask is used to mask part of the jacket Before, the collar was heavily influenced by the chest, reducing the influence on it. The difference is subtle
By using an Inpaint Mask, we can let Weight Inpainting take care of creating smooth weights for us, to our liking, instead of having to manually edit several vertex groups at once while trying to keep them smooth.
This allows a powerful workflow, by authoring a single vertex group that we use as a mask.
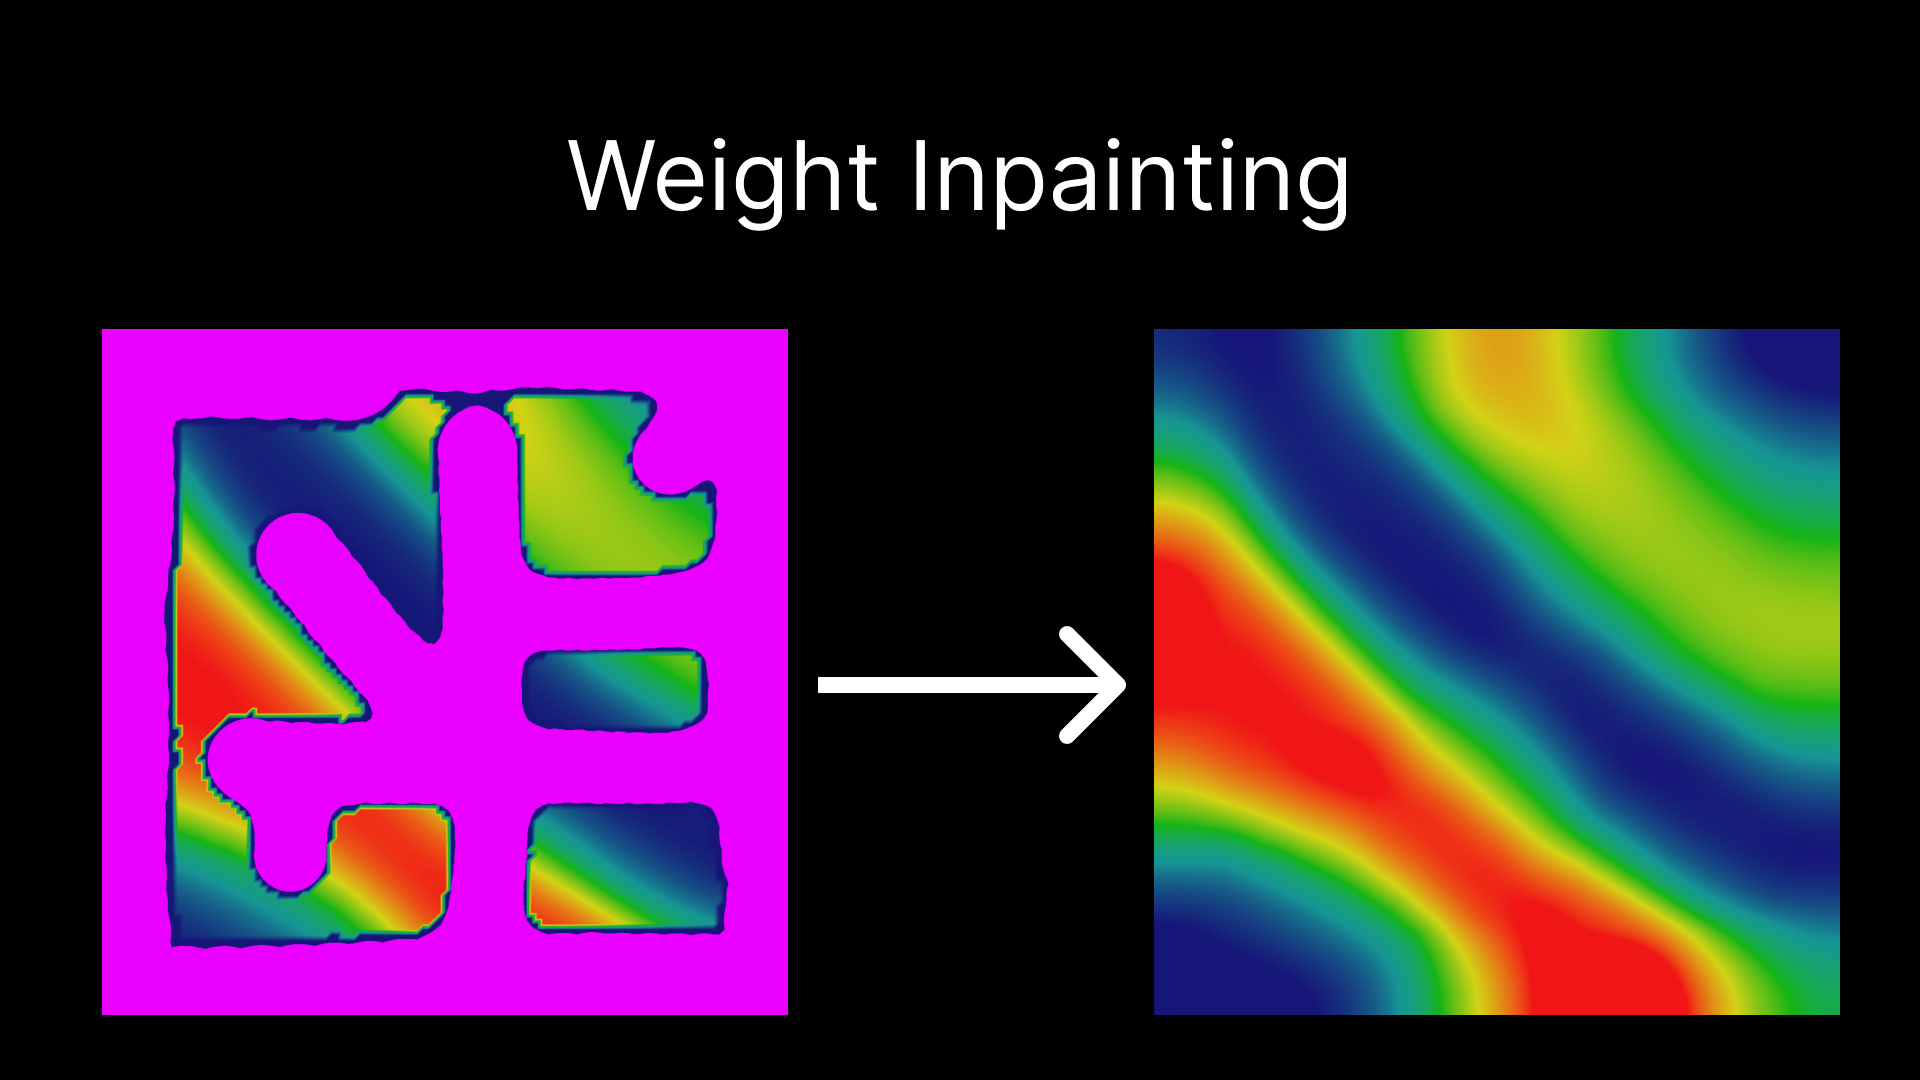
 Weight Inpainting is a crucial part of the algorithm and does most of the heavy lifting.
Instead of having to manually edit weights with Weight Painting, we can use the Inpaint Mask to control the Weight Transfer process.
To get more intuition about Weight Inpainting, here you can see how it will fill in the areas covered in pink.
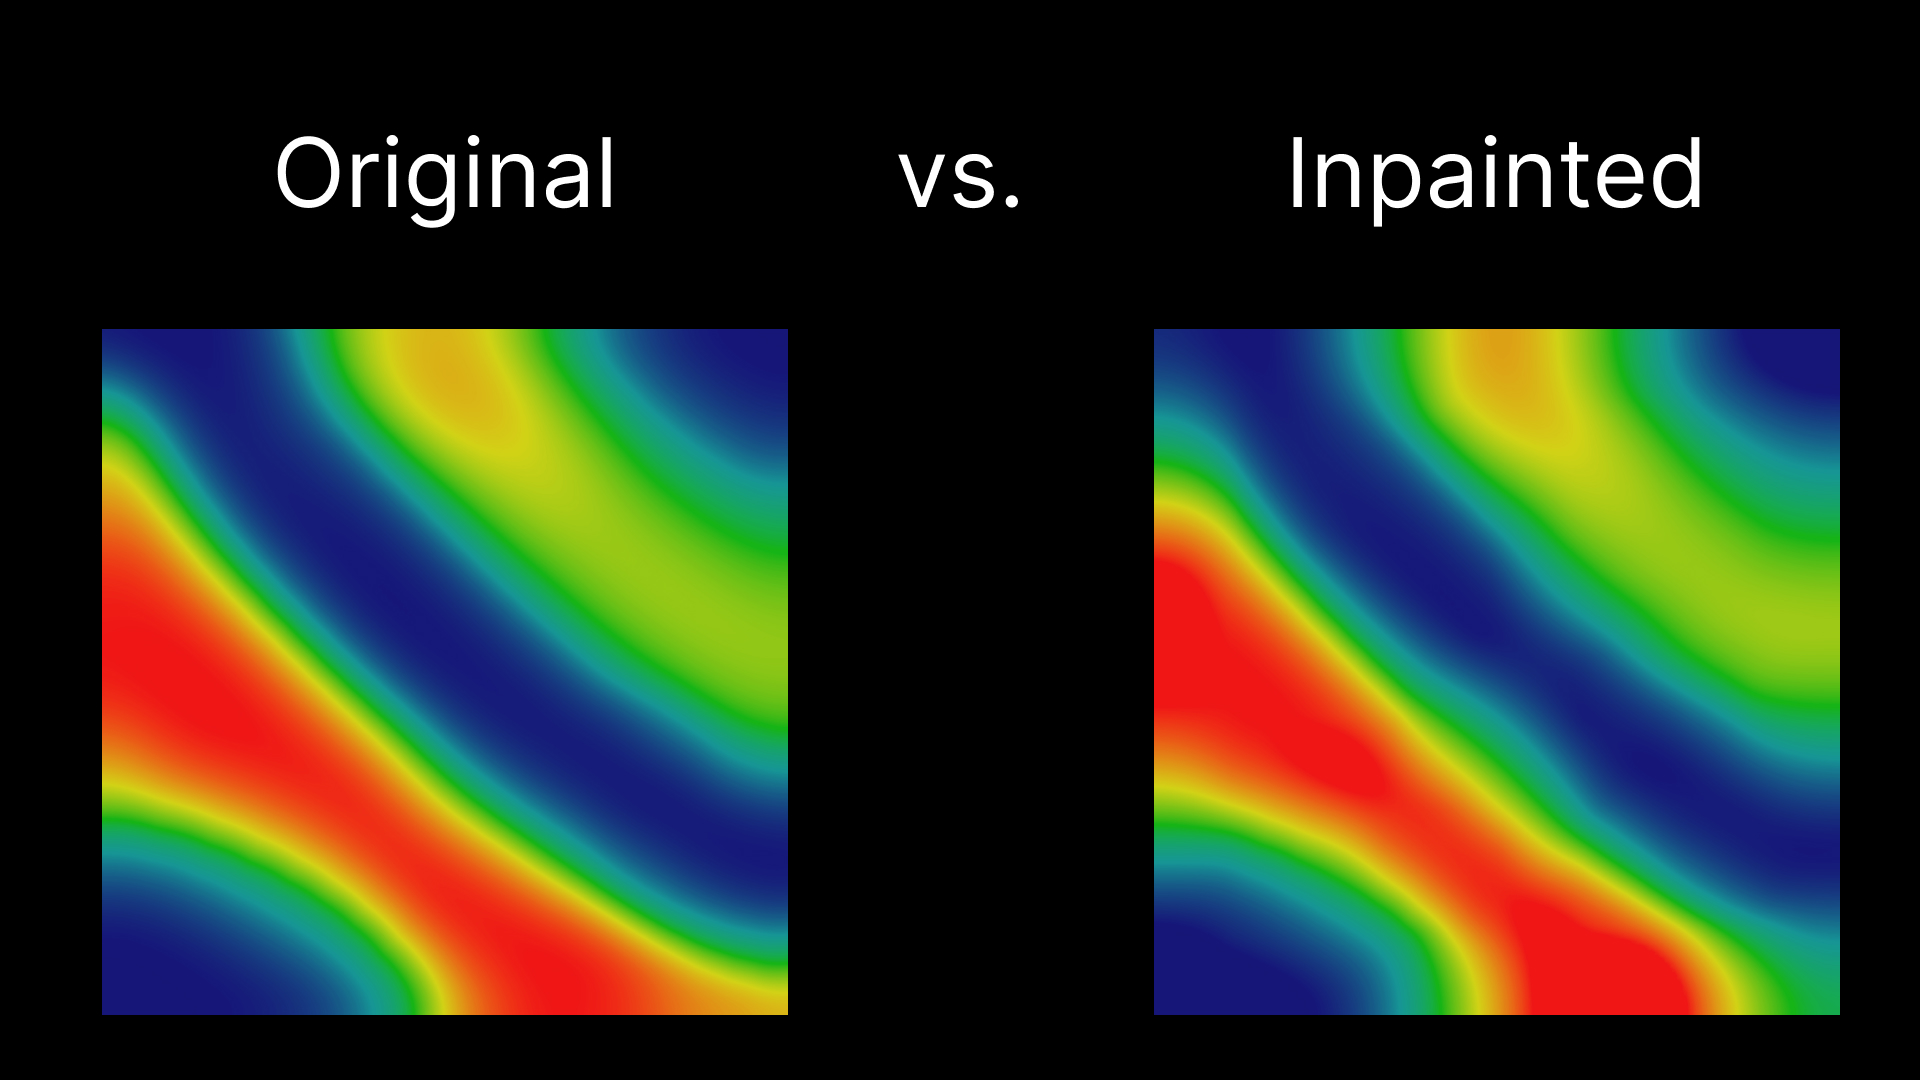
 Comparing the original weight painting that was used but with masked out areas, Weight Inpainting is able to reproduce similar weights like the original.
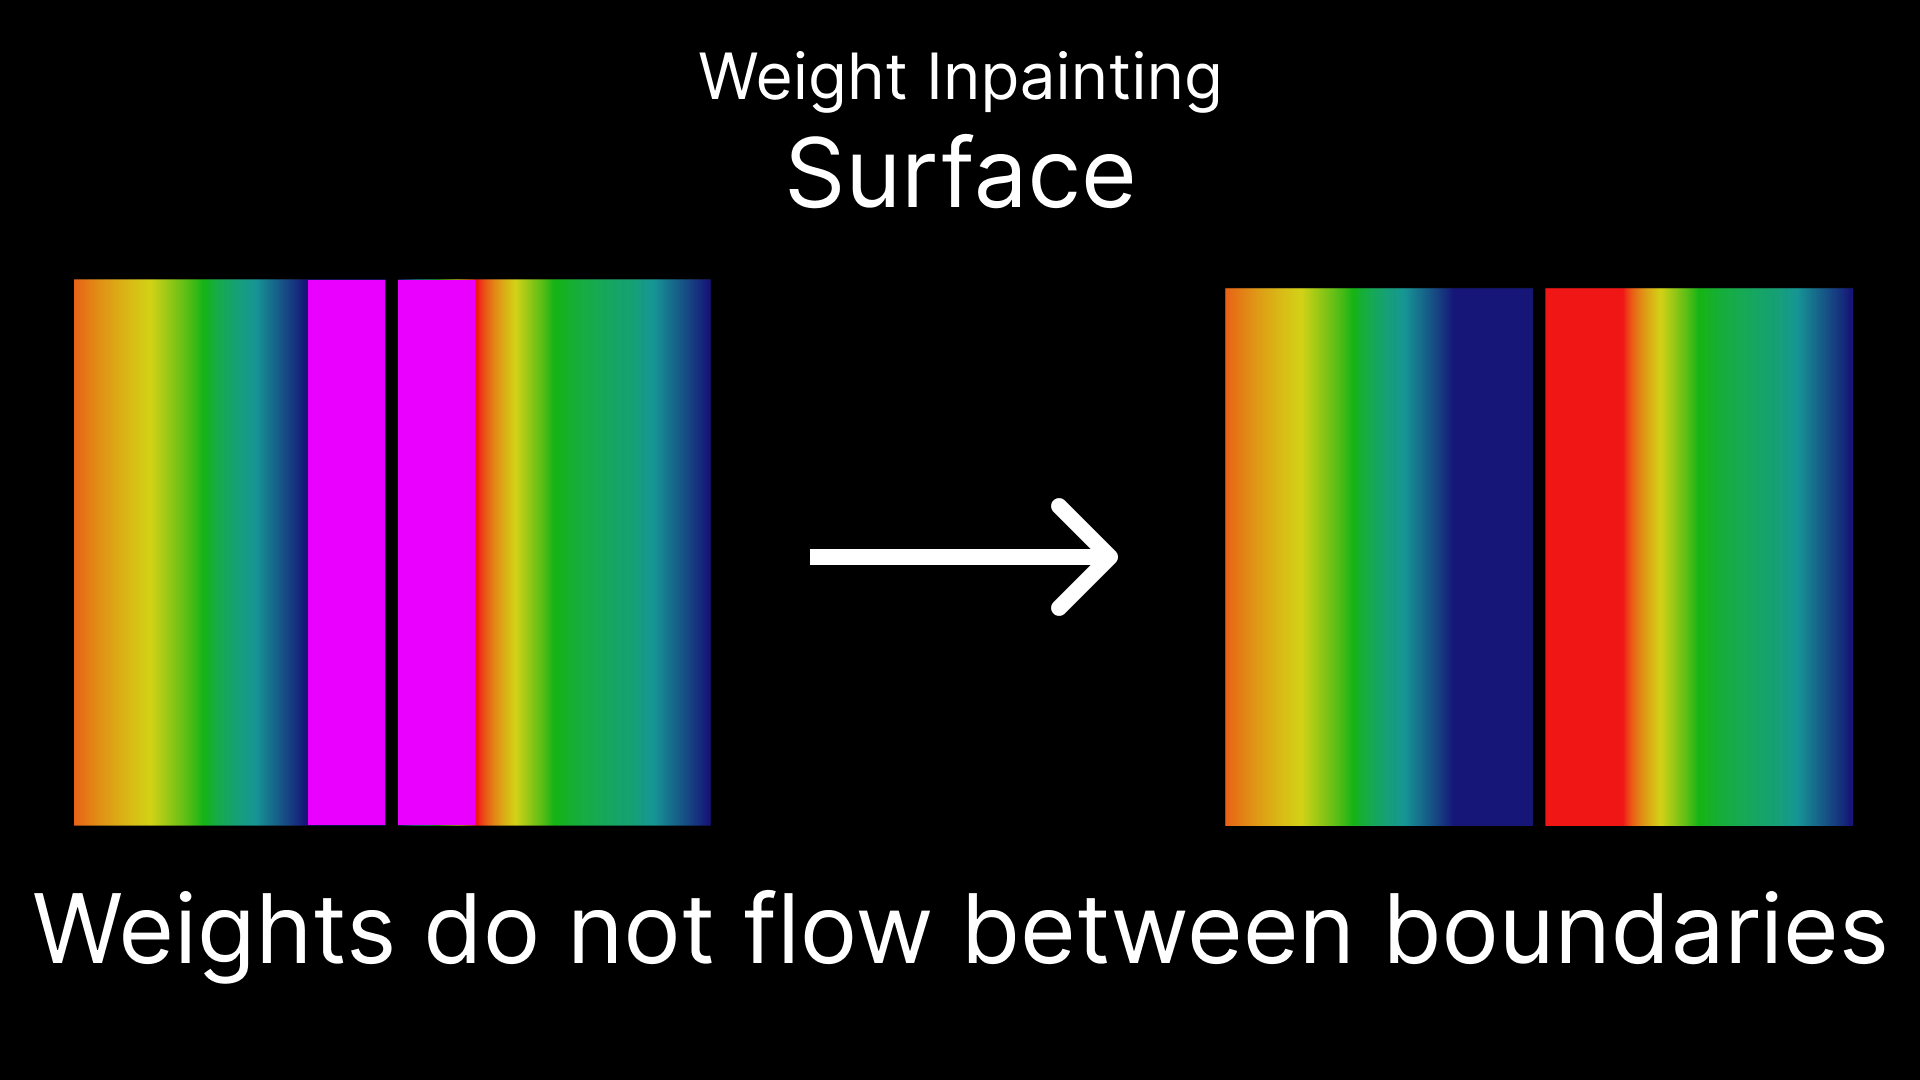
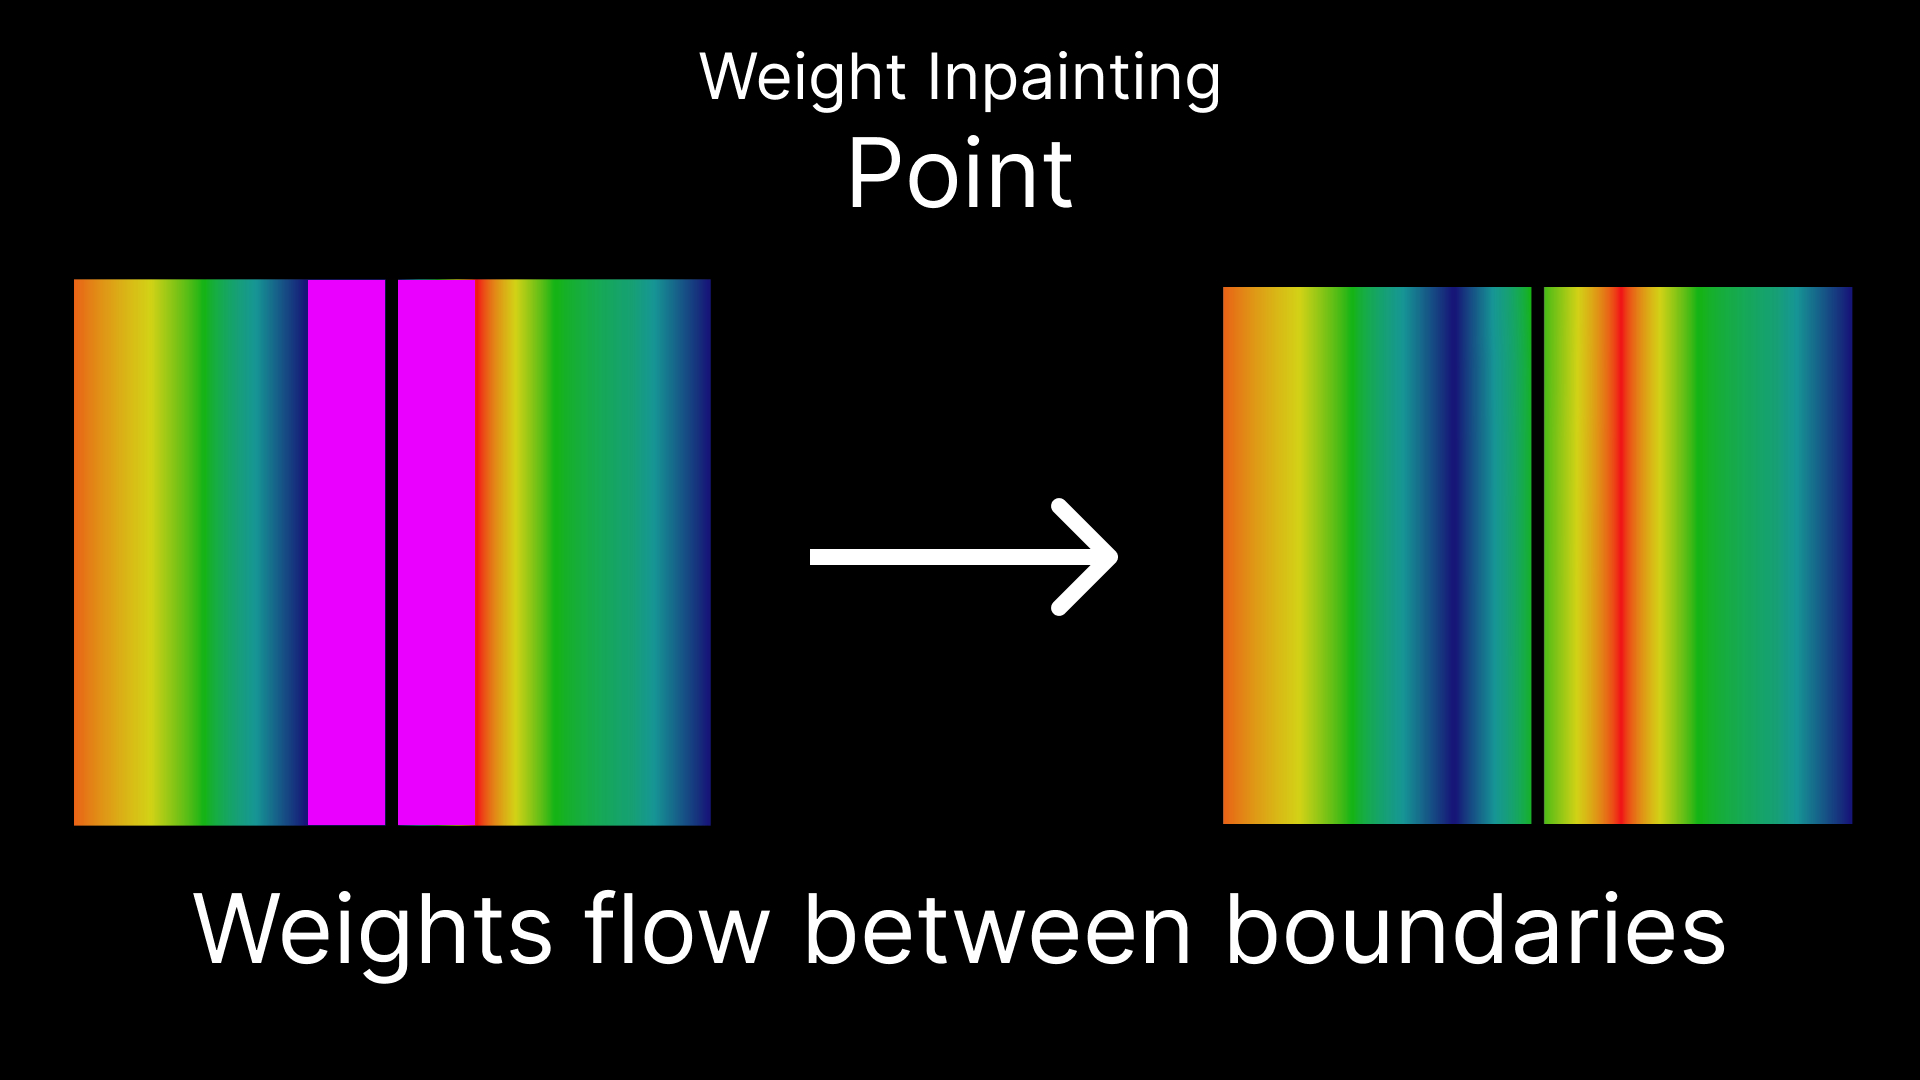
 The Weight Transfer has two modes, Point & Surface.
In Surface mode, Weight Inpainting can not infer transferred weights outside of the boundaries.
In this mode, it is more likely that Weight Inpainting can fail compared to Point mode. More about this later.
 In Point mode, the mesh gets internally remeshed to allow weights flow outside of boundaries.
Because of its robustness, this is the default mode.
 Weight Inpainting can fail when a part of the mesh, a loose part, has all weights rejected.
The recommended method to handle that fail case, is to separate the parts that make the Inpainting fail, from the object. The separated parts can later get the weights transferred using ordinary Data Transfer with the initial mesh as source and merged.

CREDITS
Explicit permission has been given to use the assets for material presented here:
- Flexuh: Assets in video, thumbnail and tutorial
- ZinPia: Body in thumbnail and tutorial
- Saikura: Hoodie in thumbnail and tutorial
ACADEMIC WORK
This Blender addon is based on "Robust Skin Weights Transfer via Weight Inpainting" by Rinat Abdrashitov, Kim Raichstat, Jared Monsen and David Hill published at SIGGRAPH ASIA 2023
You can find the project page here https://www.dgp.toronto.edu/~rinat/projects/RobustSkinWeightsTransfer/index.html
When using the addon for academic work please cite them!
Changes to the original work:
- Allow flipped normals
- Handles solid meshes when vertex normals show into opposite direction of the vertex normals on the body
- Remesh using Robust Laplacian's point cloud Laplacian (During Point mode)
- Workarounds
libigl.min_quad_with_fixedfailing during Inpaint when a disconnected mesh doesn't have any known values/matches
- Workarounds